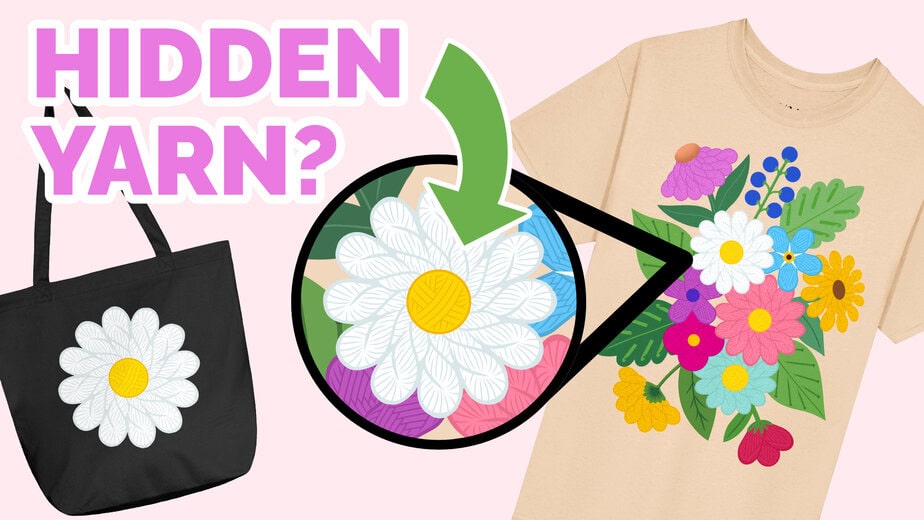
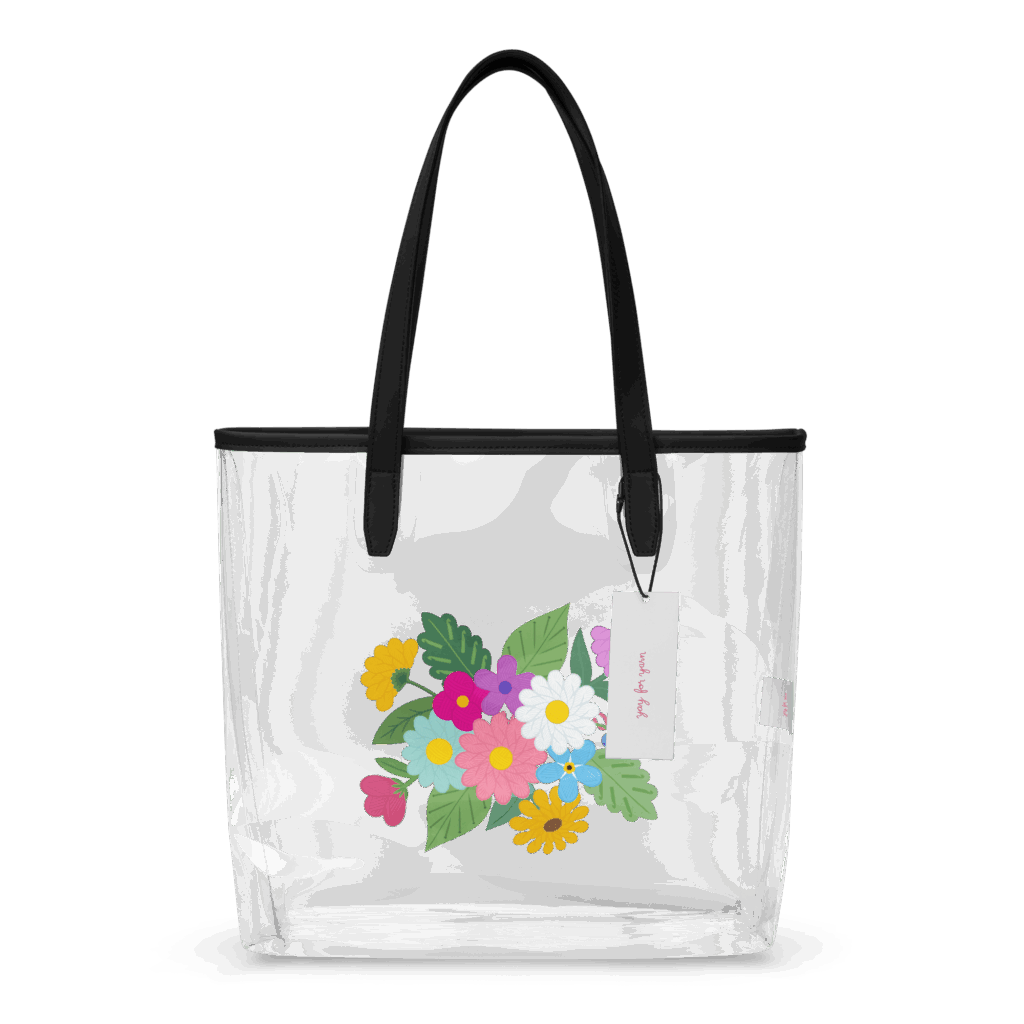
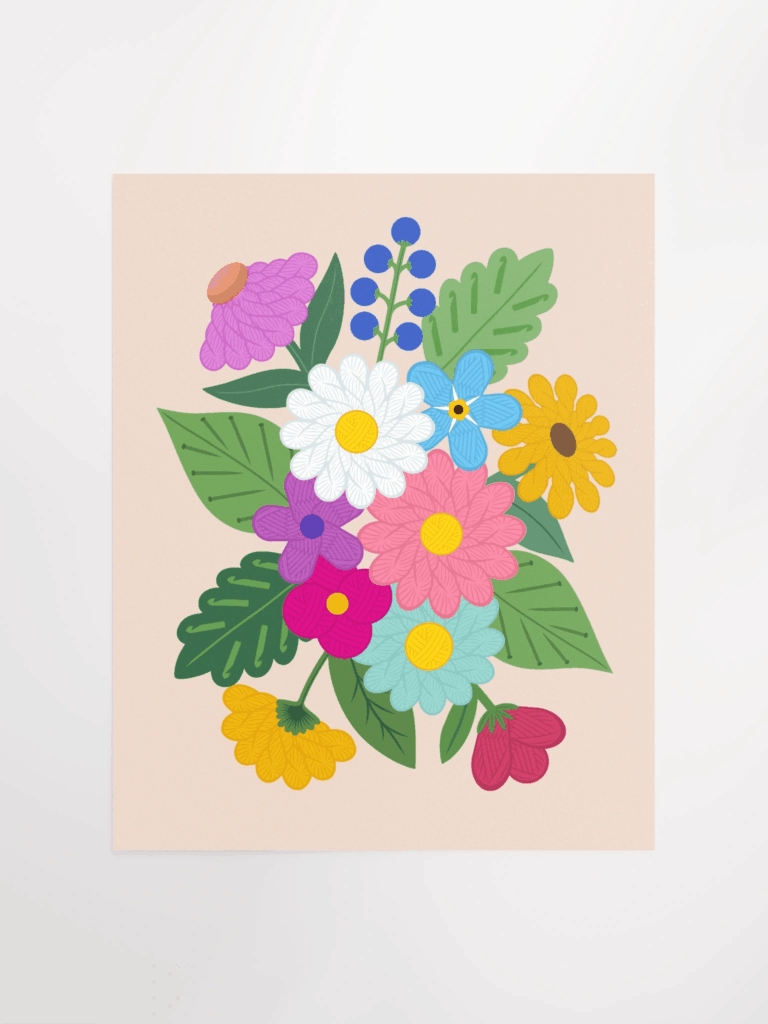
Find the perfect gift for a knitter or crochet-lover in my NEW merch collection, featuring a floral print with hidden yarn, knitting needles, & crochet hooks!
Looking for gift ideas for knitters and crocheters, but don't want to just buy them more yarn?
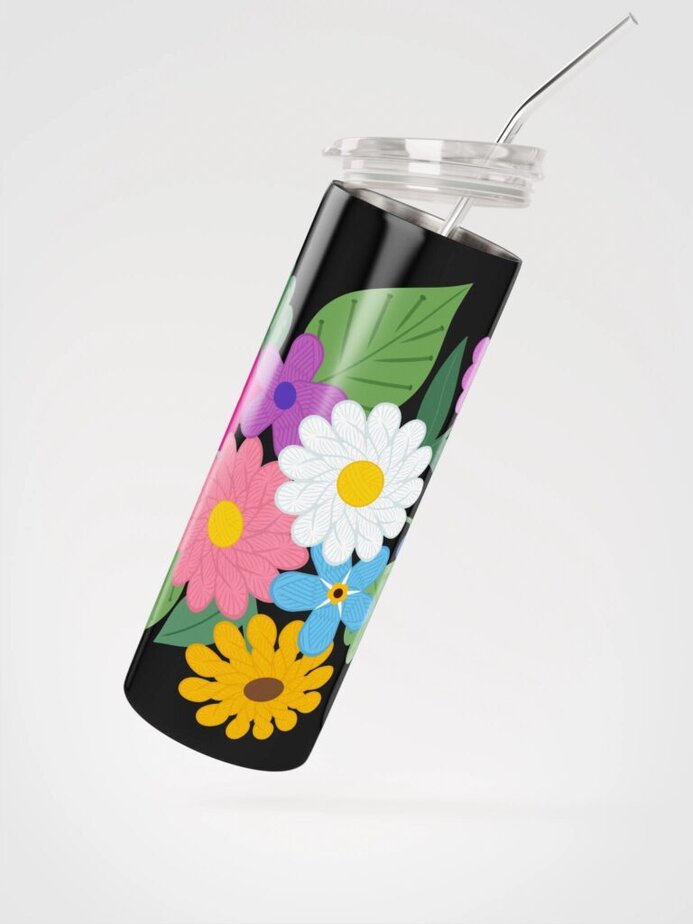
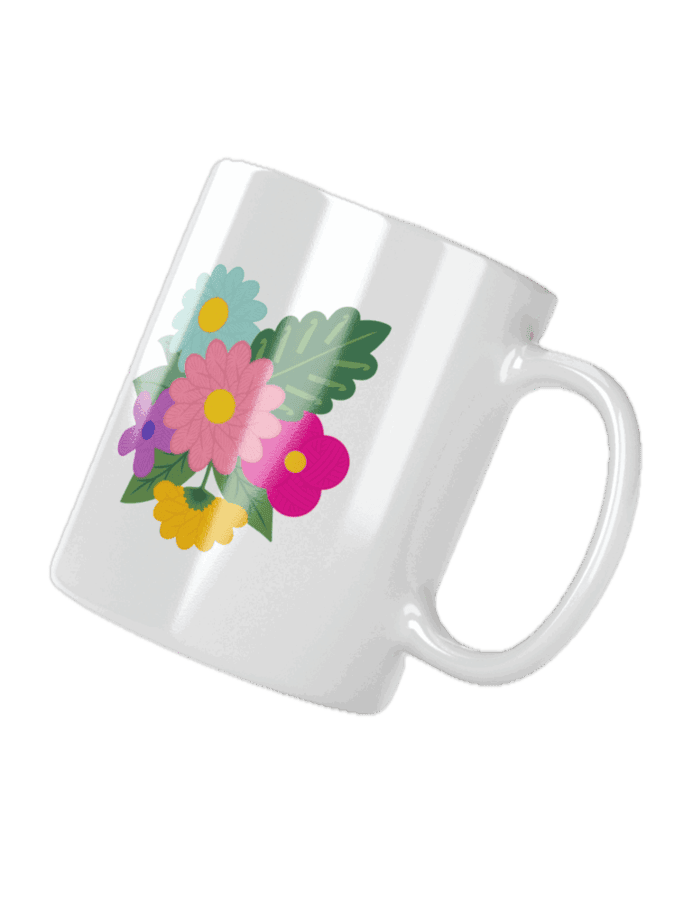
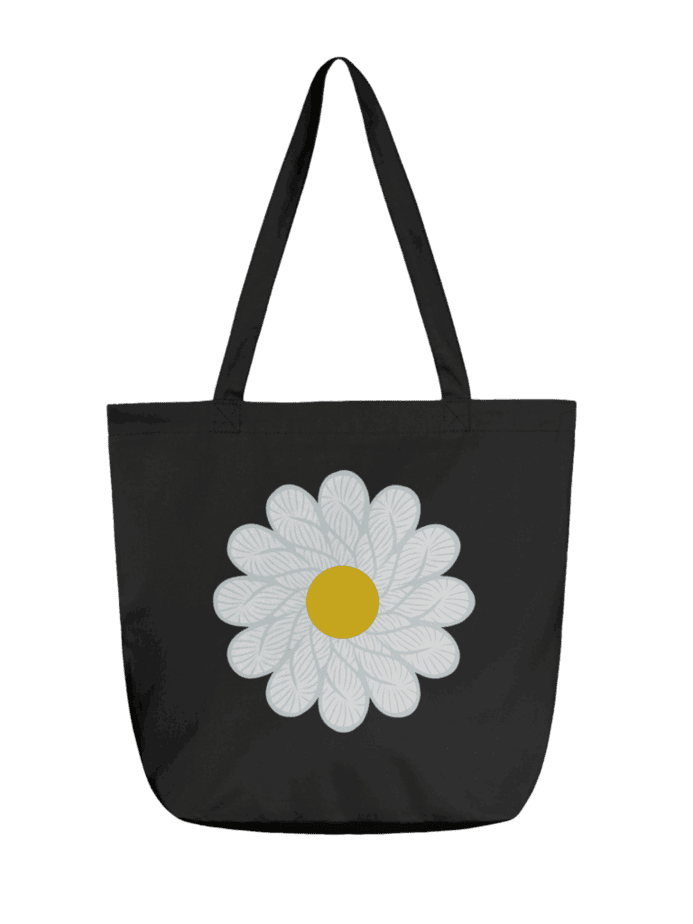
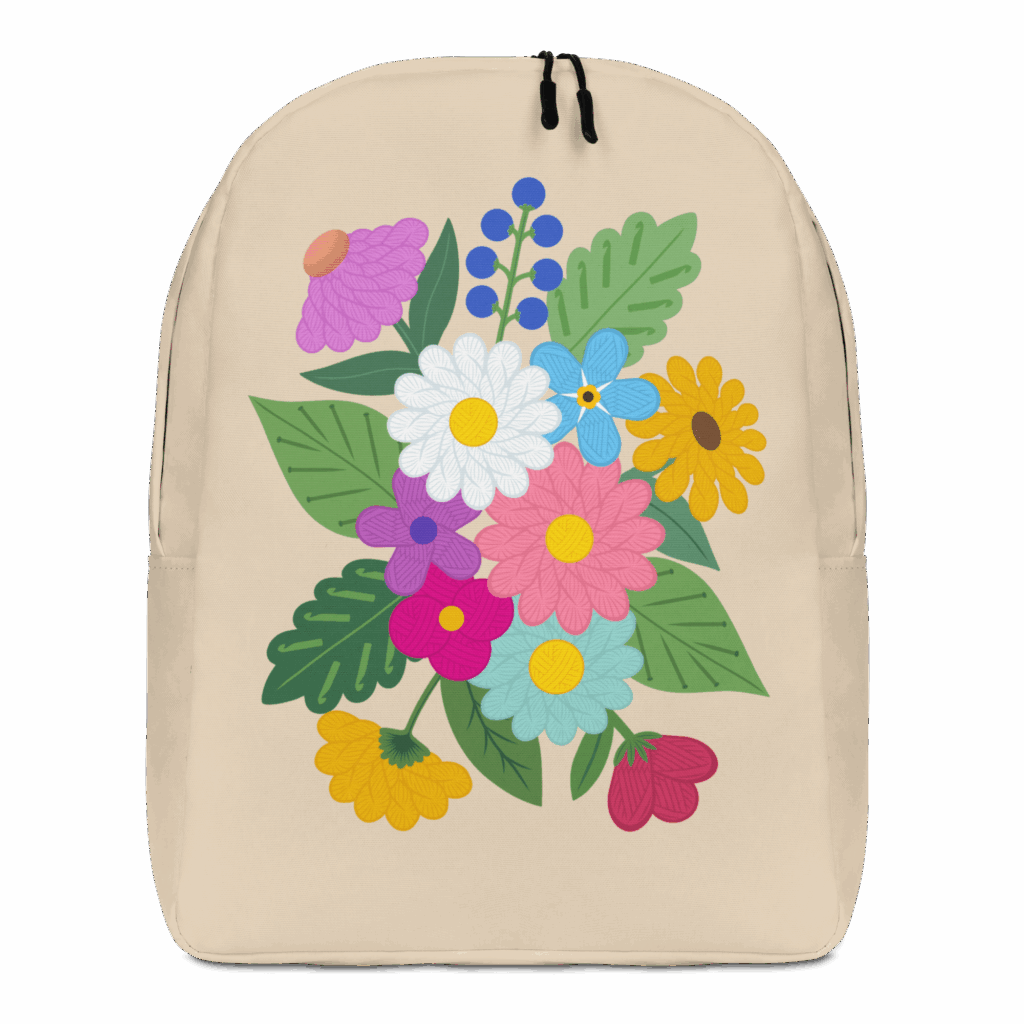
Many of the yarn-themed gifts out there are simply drawings of yarn skeins or knitting needles with a silly saying printed on a mug or t-shirt, but in designing my own yarn-themed merch collection, I wanted to do something unique and different. So I decided to hand-draw my own yarn-themed digital art, and hide hanks, balls, and skeins of yarn within a floral print. Many people may only notice the flowers... but upon looking more closely, the yarn crafters will see the yarn and hidden knitting needles and crochet hooks.
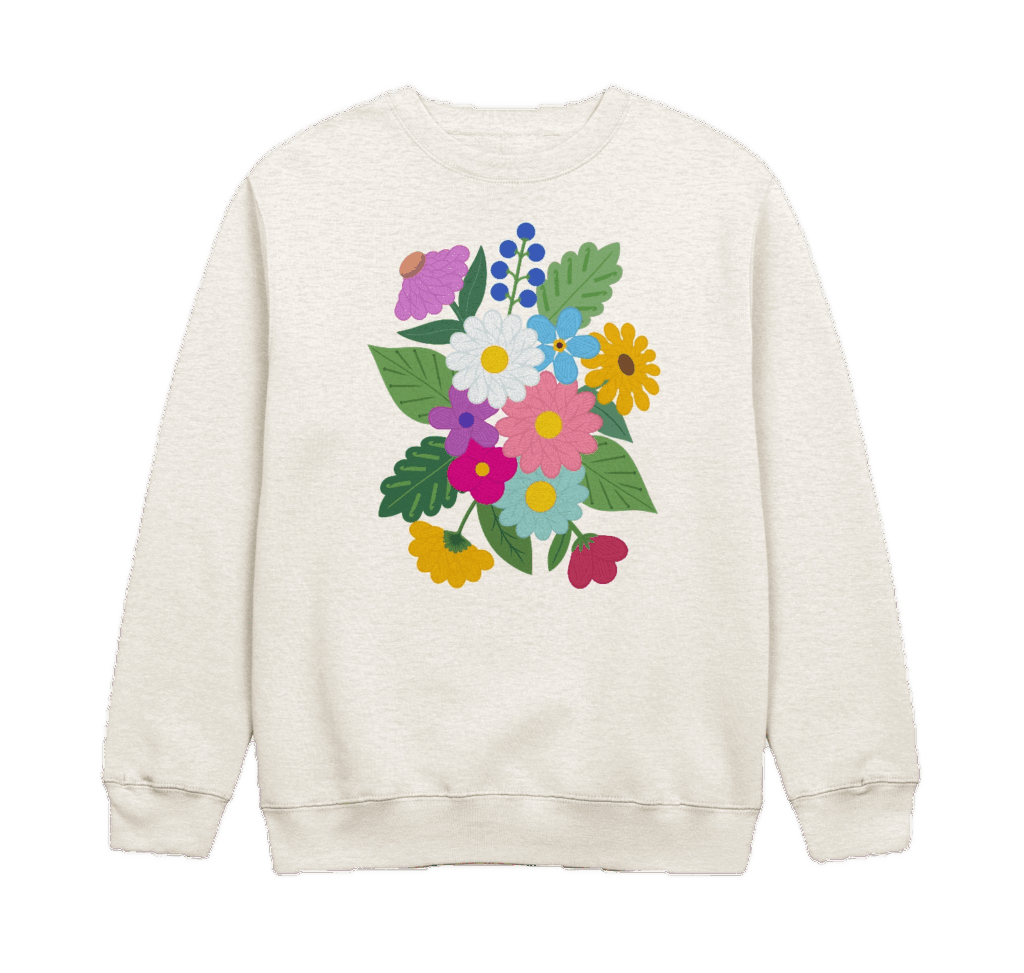
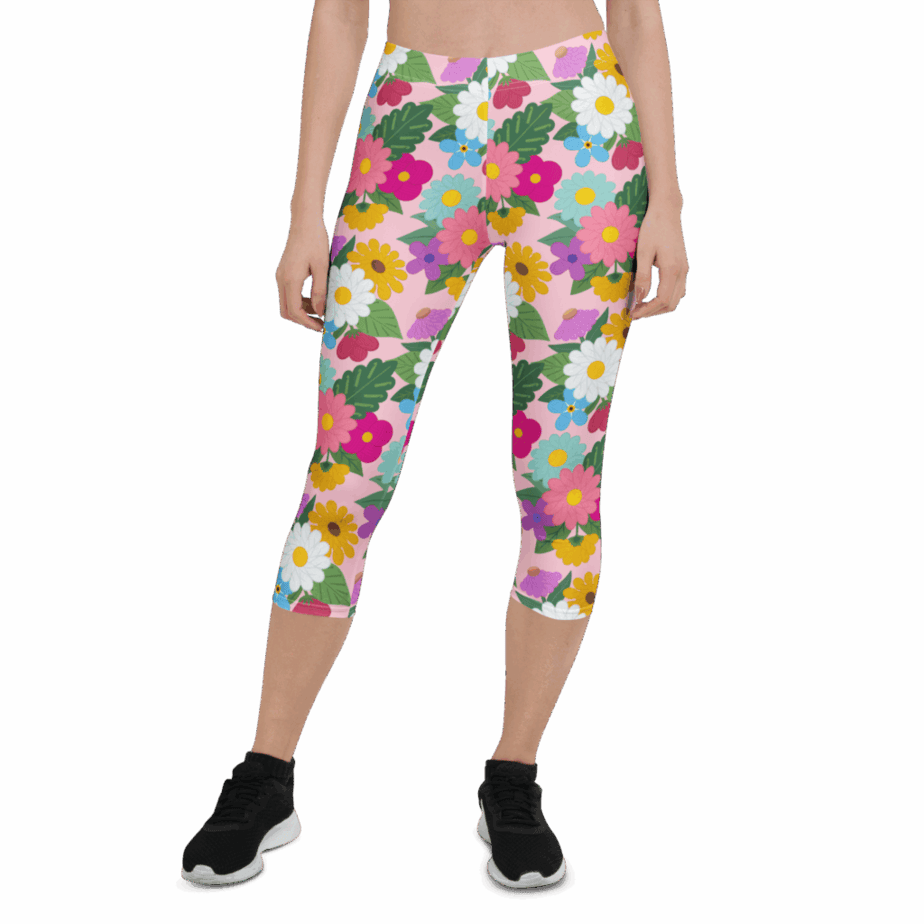
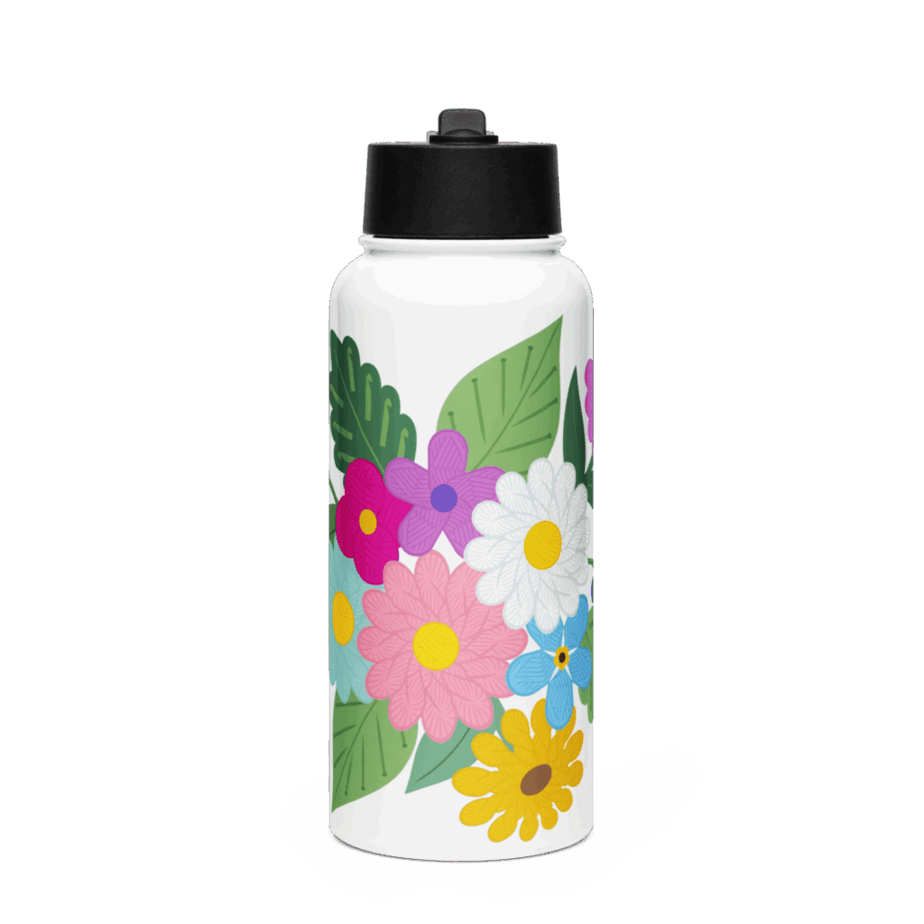
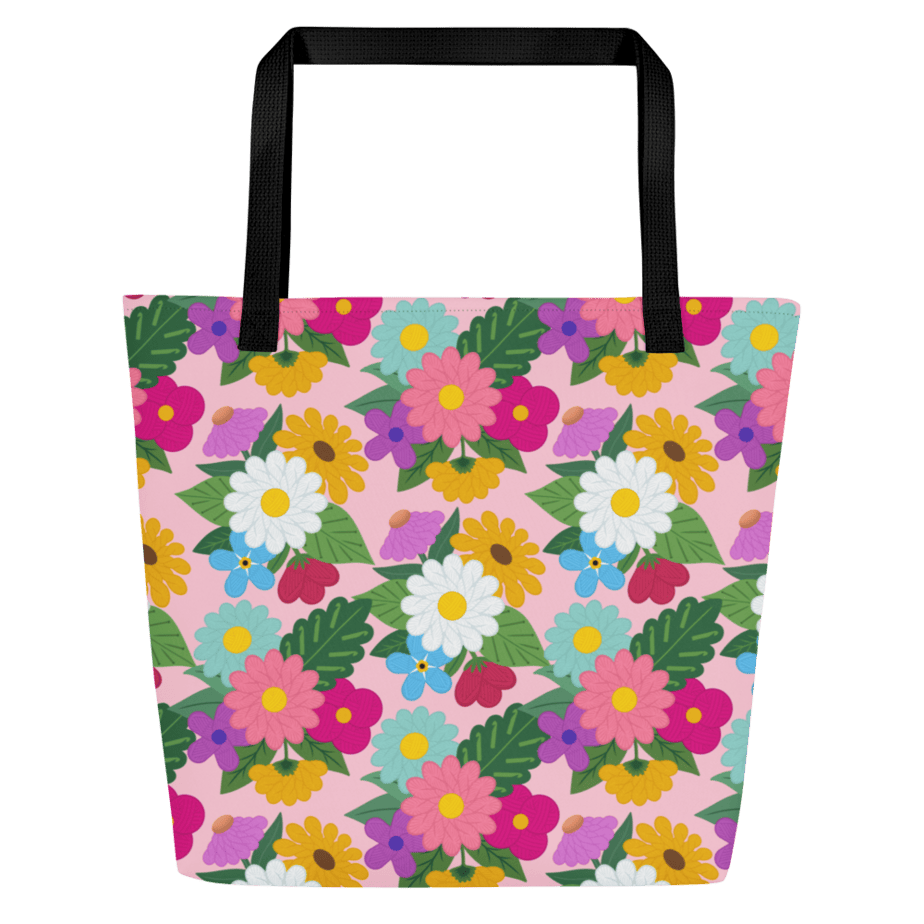
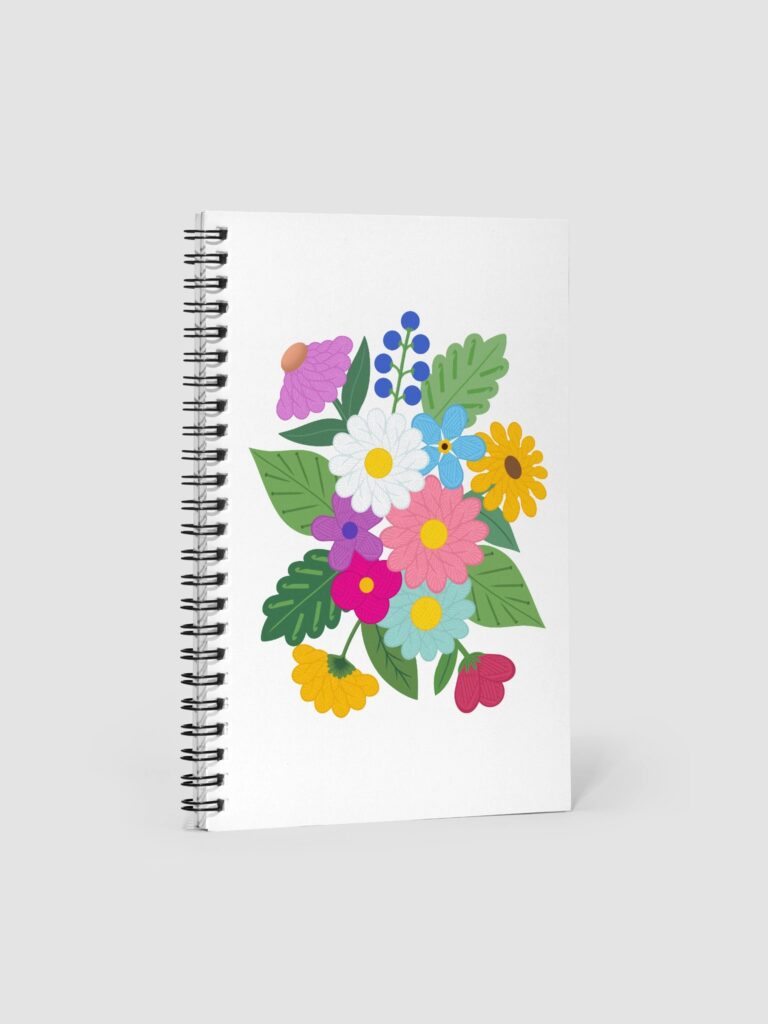
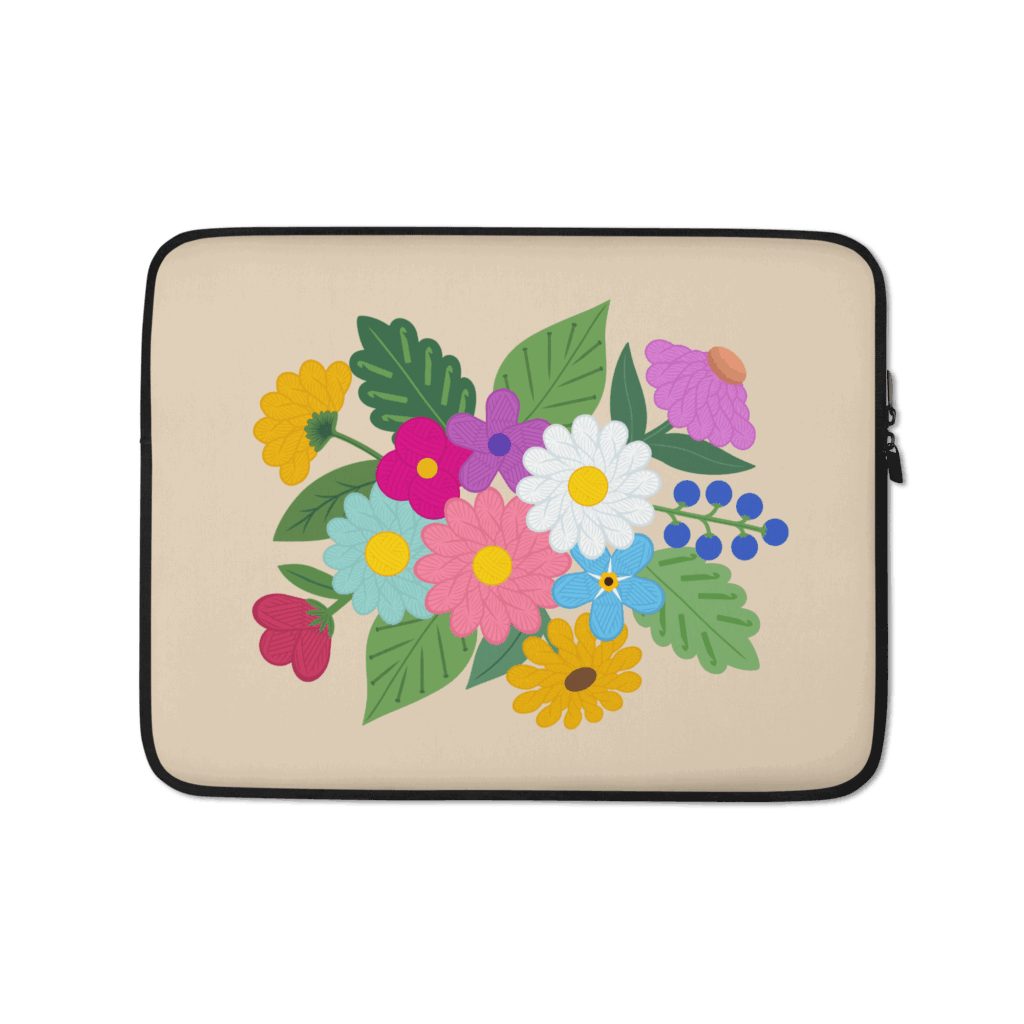
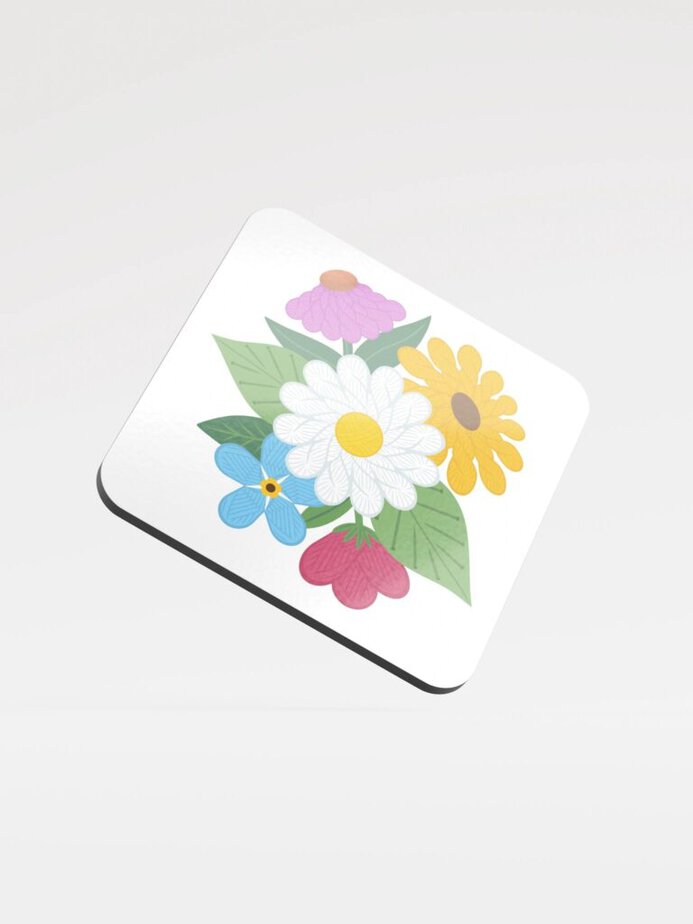
Arranged as individual 'bouquets', as well as an allover print, the floral design is available on many items, from t-shirts, backpacks, totes, and project bags, to water bottles and drink ware, stickers, stationery, and accessories.
Unbox the Collection With Me:
If you're looking for a gift for a crocheter, knitter, or yarn-lover, perhaps you'll find something the recipient will love among these yarn-themed items.
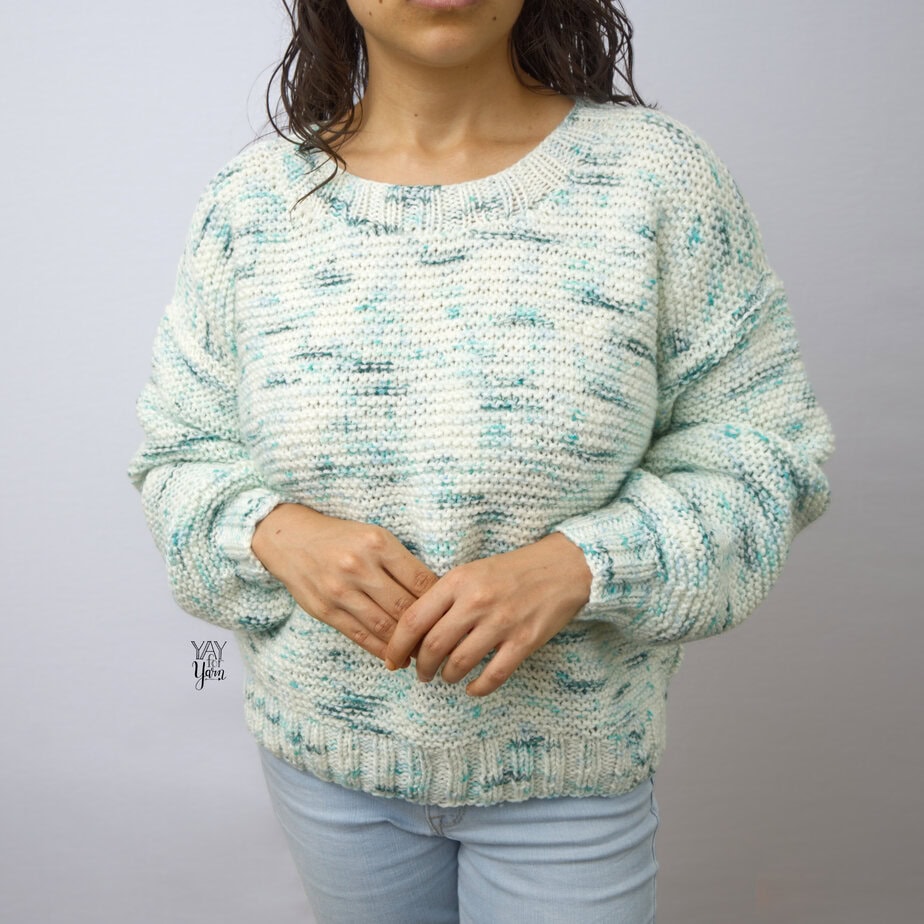
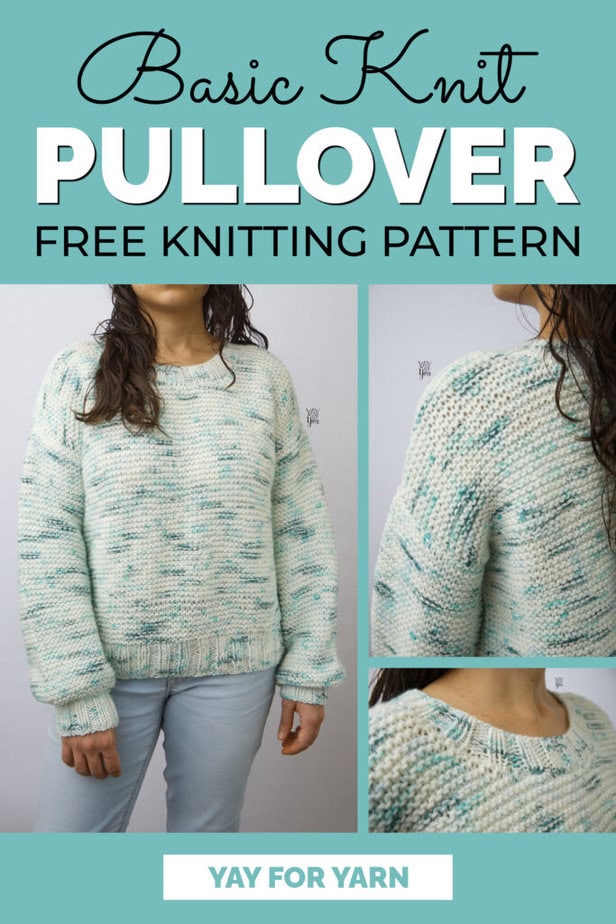
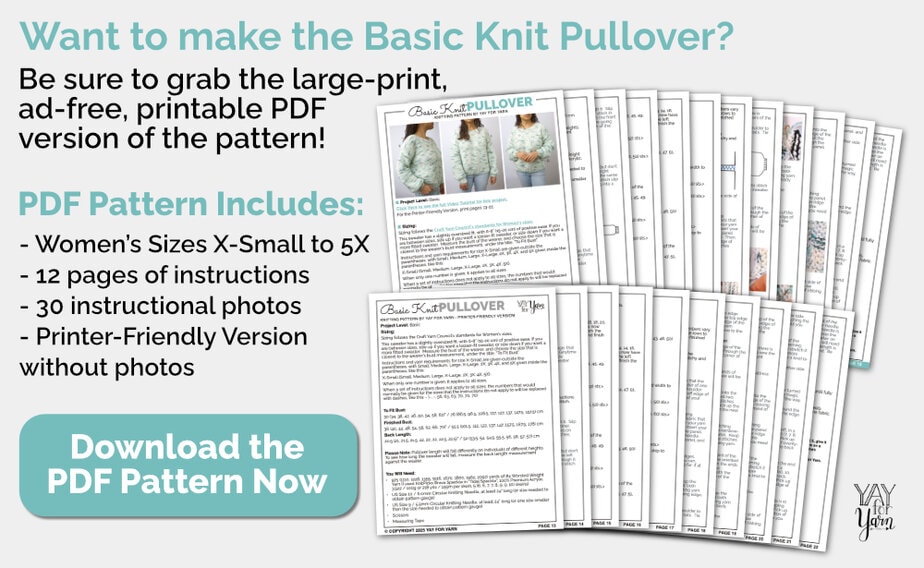
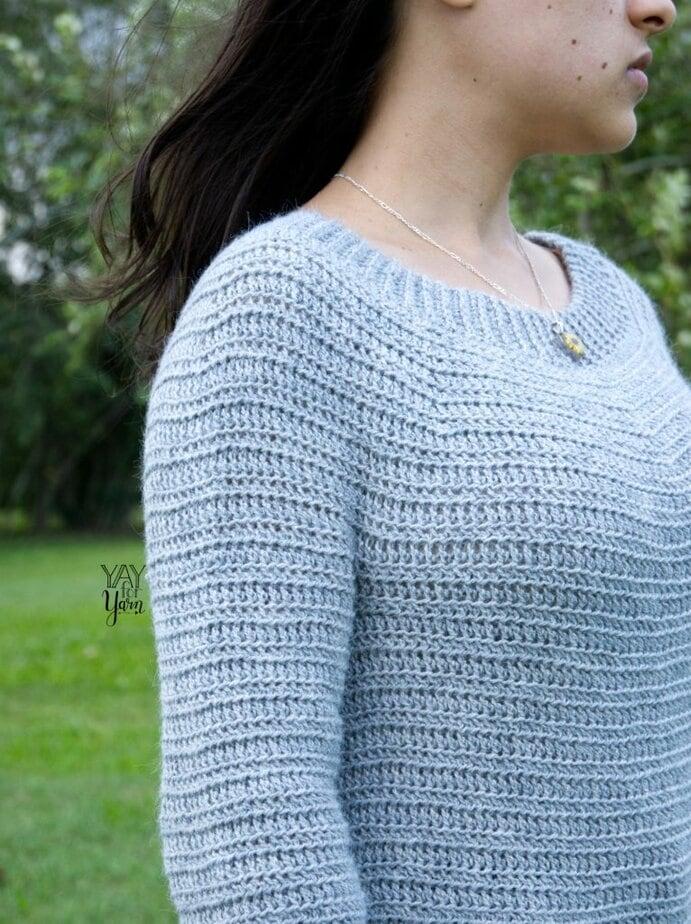
Looking for a simple pullover knitting pattern for women? This free sweater pattern is made using only basic knitting techniques, with minimal shaping. Start making your own Basic Knit Pullover today with this free pattern & video tutorial for beginners.
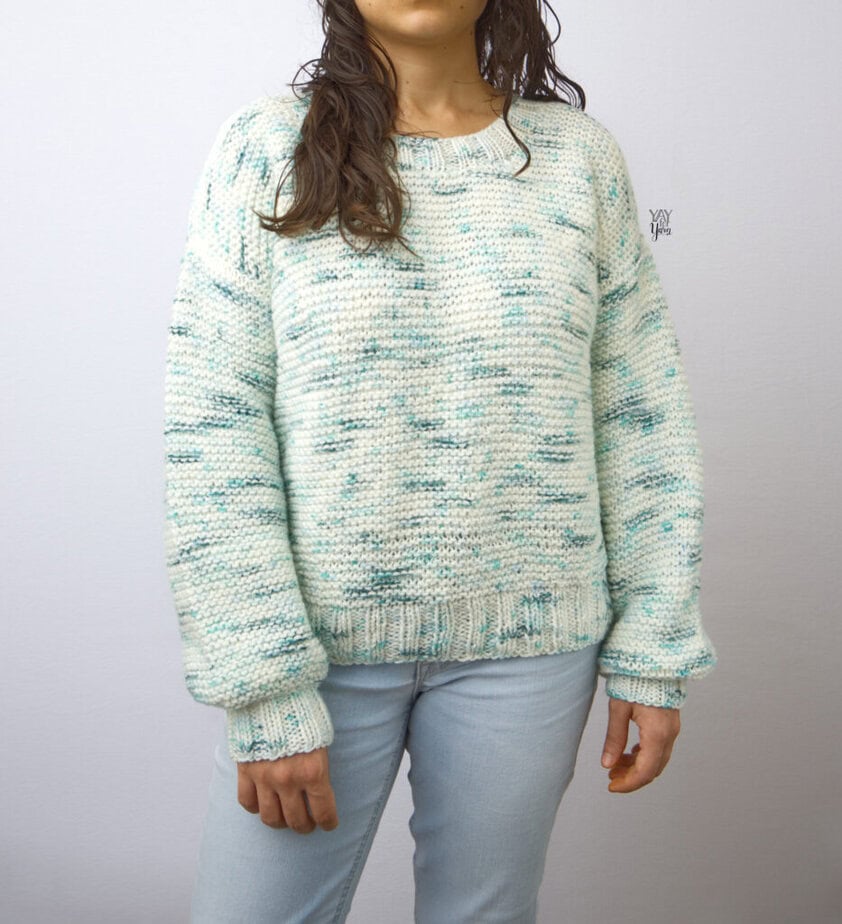
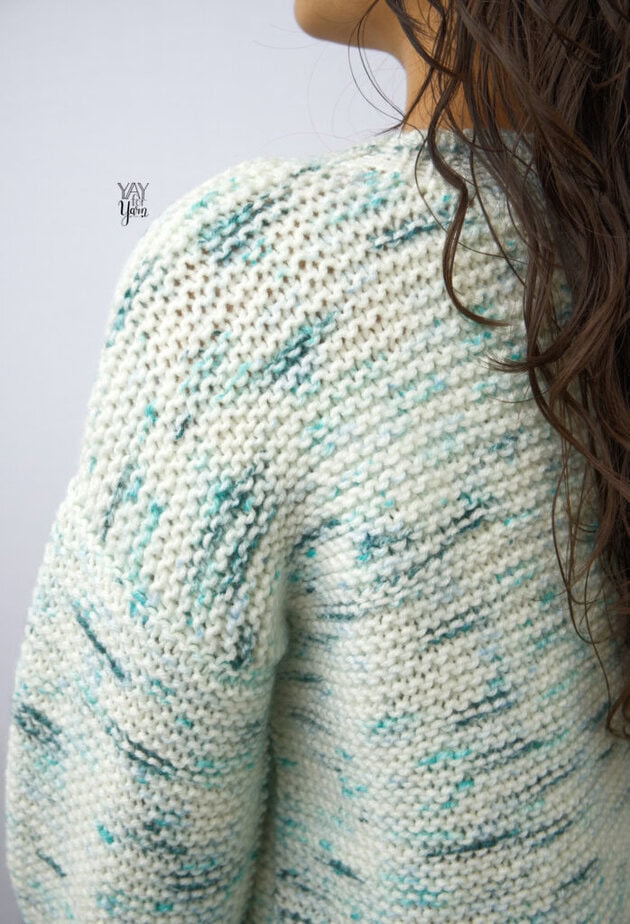
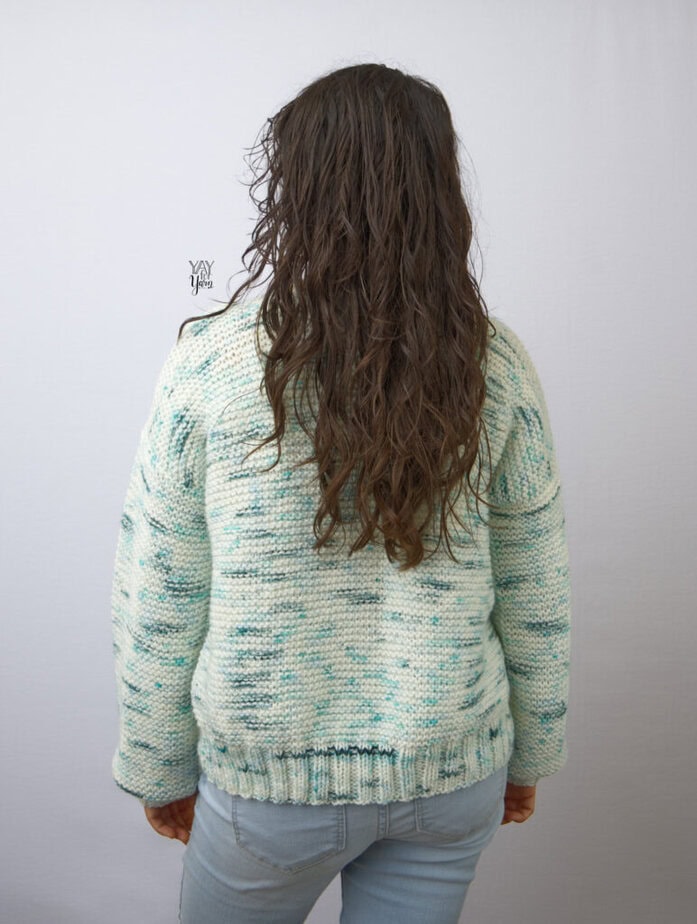
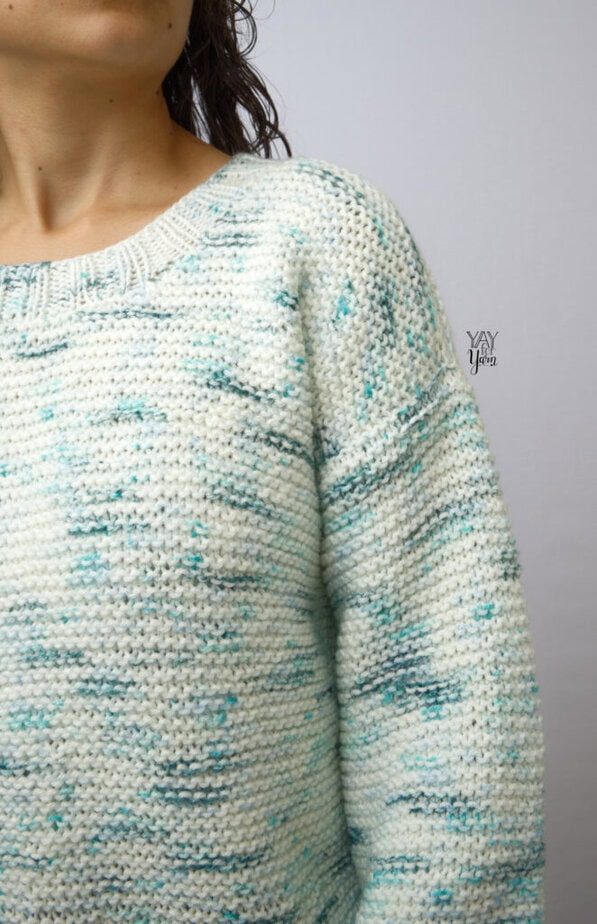
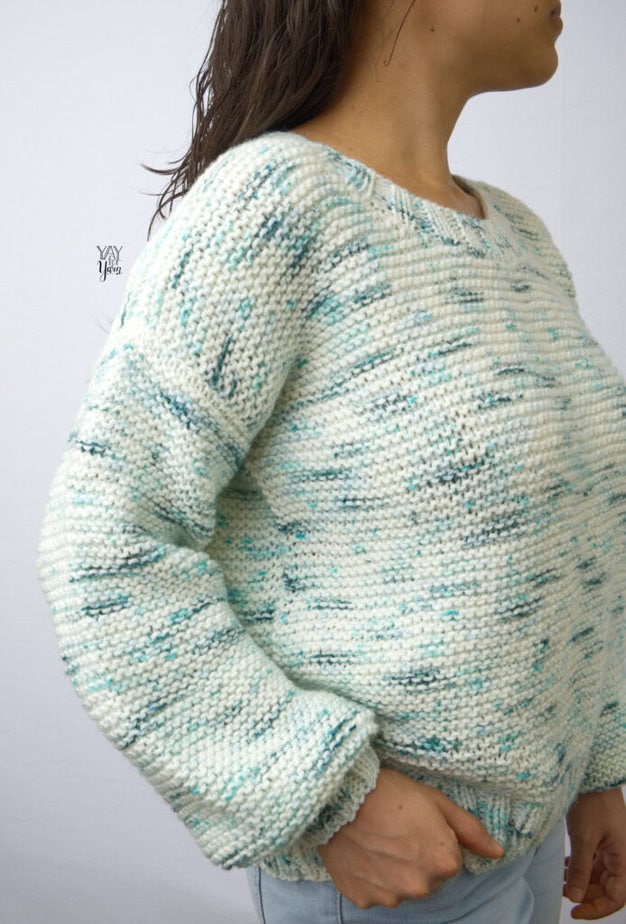
A simple pullover sweater is a cozy and versatile wardrobe staple. The Basic Knit Pullover is simple enough to be approachable for beginners familiar with fundamental knitting techniques, and is perfect for when you just want to make an easy sweater that's not too complicated to knit. Its classic, slightly oversized silhouette is made with minimal shaping, and the garter stitch fabric keeps purl stitches to a minimum. This sweater is also a great canvas for showcasing the beauty of multicolored or hand-dyed yarns, or adding your own custom stripe pattern.
(In some countries, a pullover sweater like this would be called a jumper.)
How to Choose the Right Yarn for a Knitted Sweater
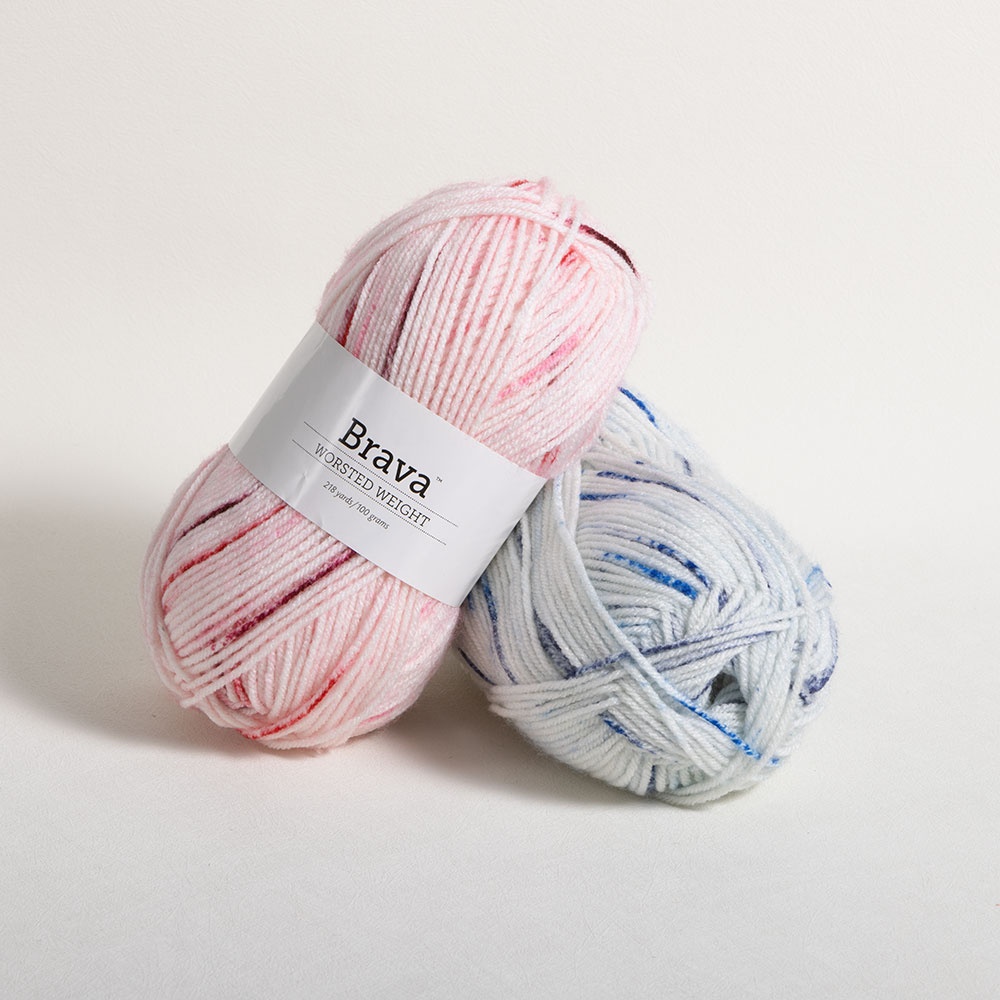
This pattern calls for #4 Medium / Worsted Weight yarn. I used KnitPicks Brava Speckle, which is soft and budget-friendly, but still has a similar look to the speckle dye technique that is popular in hand-dyed yarn.
Most #4 Medium Weight yarns will be suitable for this project. For more info on the US Standard Yarn Weight System that classifies the thickness of a yarn, click here.
When choosing a yarn for a knitted sweater, you'll want to make sure the yarn you are using feels soft against the skin. No one wants to wear an itchy sweater! Your yarn doesn't have to be expensive to be comfortable, though. The KnitPicks Brava Speckle that I used is a budget-friendly acrylic, but still feels soft enough to make a cozy garment.
A simple sweater like this one is great for highlighting the lovely colors in a multicolored or variegated yarn, or working stripes in the colors of your choice. A solid colored yarn would also work very well for this pattern, creating a versatile wardrobe staple.
Why Do I Need a Circular Knitting Needle to Knit this Pullover?
Even though this sweater is knit mostly in flat pieces (working back and forth in rows), straight knitting needles are not really long enough to comfortably accommodate the amount of stitches that need to be knit in each piece. A circular needle is very handy in this instance, because it can be used to knit back and forth in rows, and its length can accommodate the number of stitches needed.
When we get to the Neck Ribbing at the end of the pattern, we will be using the circular needle to knit in the round, but all the other portions of the sweater are knit flat.
There are also two needle sizes required for this pattern. One needle size will be used for the main portion of the sweater, and a needle that is one size smaller than the main needle will be used for the ribbing.
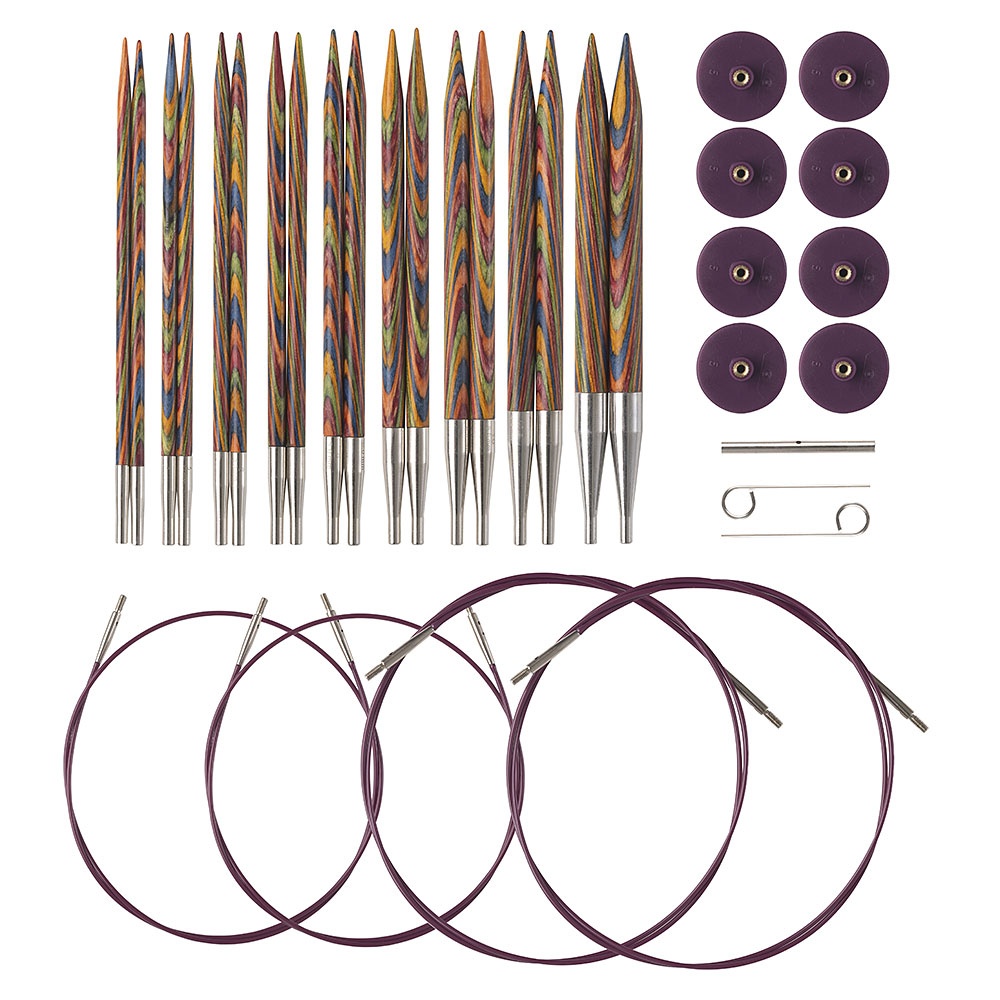
However, a regular (fixed) circular needle in the size that you need to match the pattern gauge, and another that is one size smaller than that, will work just fine if you don't have interchangeable circular needles.
How to Match the Pattern Gauge and Choose the Right Needle Size
Even though the pattern gives a recommended needle size to use for this project, you’ll need to choose the needle size that gets you the gauge specified in the pattern. This will ensure that your sweater will turn out the right size, and prevent you from running out of yarn before you’re finished.
To make your gauge swatch, cast on enough stitches with the recommended needle size to make a square about 5 inches wide, and knit every stitch across each row until your piece measures about 5 inches high. Then, block your swatch and measure your gauge.
If your gauge does not match the gauge given in the pattern, you can unravel your swatch, and try using a larger or smaller needle size to knit the gauge swatch again. This will help you know which needle size you’ll need to use to make this project. Learn more about checking your gauge here.
Once you find the needle size that gives you the correct gauge for the pattern, you'll also need another needle that is one size smaller than the needle size that you used to match the pattern gauge. The smaller size needles will be used for the ribbing, to make the ribbing neat, stretchy and elastic, and the larger needles will be used for the main fabric of the pullover.
Check out more beginner-friendly free knitting patterns:
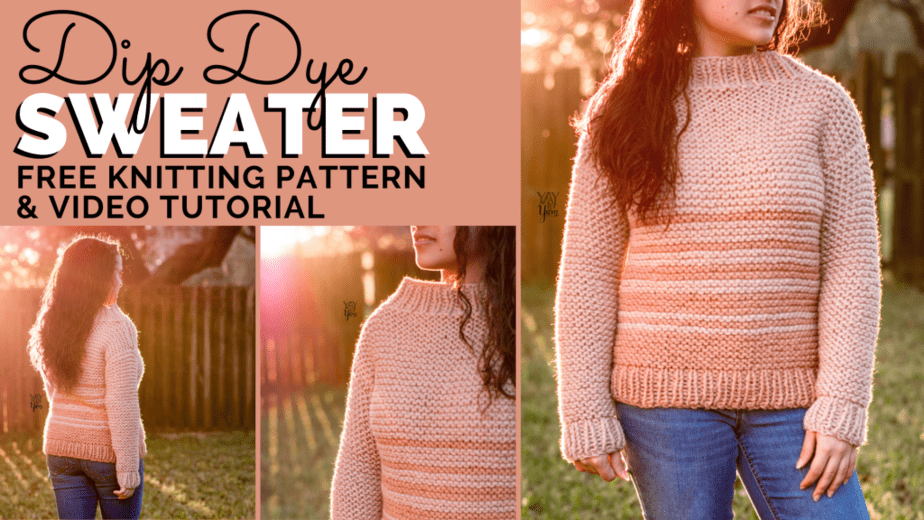
Dip Dye Sweater – FREE Easy Women’s Pullover Sweater Knitting Pattern by Yay For Yarn
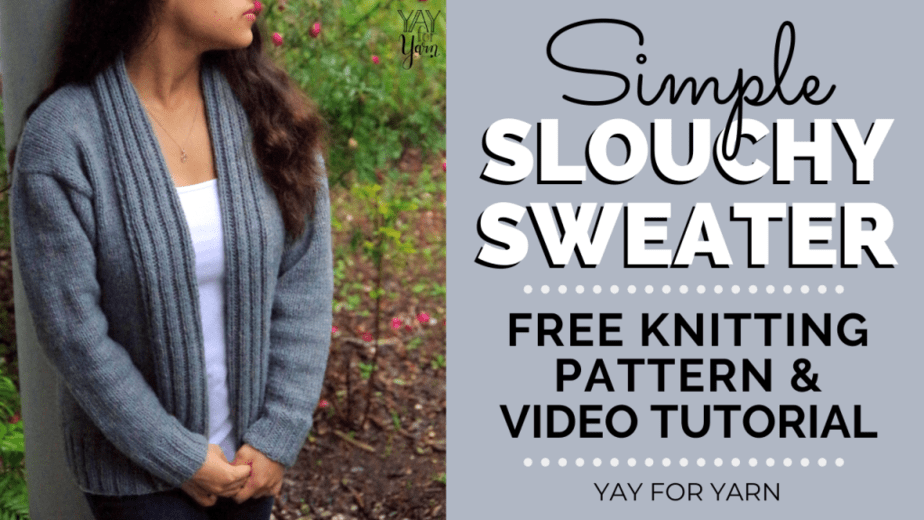
Simple Slouchy Sweater – FREE Knitting Pattern & Video Tutorial – How to Knit a Cardigan for Beginners
The Easiest Knitted Hat Ever (Made from a Rectangle!) – Free Knitting Pattern by Yay For Yarn
How do I Choose a Size?
The Basic Knit Pullover knitting pattern includes instructions for 9 sizes, from a women’s size X-Small to 5X. To decide which size you want to make, you’ll need to measure around the fullest part of the bust, the chest circumference. Then, follow the instructions in the “Sizing” section of the pattern to select the size according to the wearer’s bust measurement.
Please note that the sweater length will fall differently on individuals of different heights. To see how long the sweater hem will fall, measure the back length measurement against the wearer.
Can I Knit This Sweater If I Am A Beginner? What Stitches and Skills Do I Need to Know to Knit a Sweater?
The project level for this easy knit sweater pattern is labeled “Basic”. To make this simple project, you’ll need to know how to work the basic knitting stitches, cast on, bind off, and work back and forth in rows. You will also need to know how to count your stitches and count your rows in garter stitch (knit every row).
Additional techniques used, such as increase and decrease stitches, as well as seaming techniques, are detailed in the video tutorial, and are approachable for a knitter who is already familiar with the basic knitting stitches.
You will also need to be comfortable reading a simple written pattern. (See this article by the Craft Yarn Council to learn more about how to read a knitting pattern.) If you are familiar with those techniques, you can make this sweater.
This sweater has a slightly oversized fit, with 6-8” (15-20 cm) of positive ease. If you are between sizes, size up if you want a looser-fit sweater, or size down if you want a more fitted sweater. Measure the bust of the wearer, and choose the size that is closest to the wearer's bust measurement, under the title, “To Fit Bust”.
Instructions and yarn requirements for size X-Small are given outside the parentheses, with Small, Medium, Large, X-Large, 2X, 3X, 4X, and 5X given inside the parentheses, like this:
When only one number is given, it applies to all sizes.
When a set of instructions does not apply to all sizes, the numbers that would normally be given for the sizes that the instructions do not apply to will be replaced with dashes, like this: - (-, -, 56, 63, 63, 70, 70, 70)
Please Note: Pullover length will fall differently on individuals of different heights. To see how long the sweater will fall, measure the back length measurement against the wearer.
You Will Need:
975 (1110, 1228, 1355, 1516, 1670, 1800, 1962, 2092) yards of #4 Worsted Weight Yarn (I used KnitPicks Brava Speckle in “Tidal Speckle”, 100% Premium Acrylic, 3.5oz / 100g or 218 yds / 199m per skein, 5 (6, 6, 7, 7, 8, 9, 9, 10) skeins)
US Size 10 / 6.0 mm Circular Knitting Needle, at least 24” long (or size needed to obtain pattern gauge)
US Size 9 / 5.5 mm Circular Knitting Needle, at least 24” long (or one size smaller than the size needed to obtain pattern gauge)
Scissors
Measuring Tape
Yarn Needle or Blunt Tapestry Needle
Locking Stitch Marker or Safety Pin
Stitch Marker that fits onto your Size 9 knitting needle
16 sts = 4” (10 cm), and 28 rows = 4” (10 cm) in garter stitch (knit every row)
(Note: Gauge should be measured after blocking your swatch.)
Once you have found the needle size that helps you match the pattern gauge, that will be the needle size you will use for most of the sweater. For the ribbing (anytime the pattern says to use a Size 9 needle), you will use a needle that is one size smaller than the needle size that you are using for the main body of the sweater.
Abbreviations:
K: knit
P: purl
st(s): stitch(es)
CO: cast on
BO: bind off
K2tog: knit 2 stitches together
*SSK: slip, slip, knit
*Kf&b: knit front and back
*This is a special stitch. See instructions below to learn how to work this stitch.
Special Stitches
SSK: Insert right needle tip into the next st as if to knit, but don’t knit through it. Slip (move) that stitch onto the right needle. Slip the next stitch in the same manner. Then, insert the left needle back through the front of the two slipped stitches on your right needle, so that both needle tips are going through those two stitches, forming an ‘X’. Knit through both of the stitches. This decreases one stitch.
Kf&b: Insert right needle tip into the next st on the left needle. Knit that st, but don’t let the old stitch slip off the left needle yet. Bring the right needle behind the left needle, and insert the right needle into the back of the same st, and knit through it again. Now let the old stitch slip off the left needle. The Kf&b increases one stitch by working into a stitch twice, once in the front and once in the back.
Basic Knit Pullover Instructions
Pullover Back
With US Size 9 knitting needle, CO 72 (80, 88, 96, 108, 116, 124, 132, 140) sts.
Row 1: K 30 (33, 37, 40, 46, 49, 53, 56, 60) sts. BO the next 12 (14, 14, 16, 16, 18, 18, 20, 20) sts. K the remaining 29 (32, 36, 39, 45, 48, 52, 55, 59) sts in your row. You now have two sections of stitches remaining on the needle. We are going to work the left shoulder (where the yarn is currently coming from) first, and go back and finish the right shoulder later.
Row 1: K 32 (35, 39, 42, 48, 51, 55, 58, 62) sts. BO the next 8 (10, 10, 12, 12, 14, 14, 16, 16) sts. K the remaining 31 (34, 38, 41, 47, 50, 54, 57, 61) sts in your row. You now have two sections of stitches remaining on the needle. We are going to work the left shoulder (where the yarn is currently coming from) first, and go back and finish the right shoulder later.
You should have 48 (50, 54, 58, 63, 69, 76, 80, 86) sts at this point.
Row 31: K across.
Repeat Row 31: 85 (97, 89, 97, 101, 91, 91, 103, 91) more times. (These numbers vary so much because the different sizes require different amounts of increase rows to have been worked. Therefore, the number of rows required to reach the finished sleeve length will vary quite a bit between sizes.)
BO all sts loosely, leaving a tail at least 1 yard long. I recommend using the Suspended Bind Off on the sleeve, to make sure the bind-off edge is stretchy and will not feel restrictive when worn.
Assembly
With right sides facing up, lay the pullover back and pullover front out so that the shoulder edges are together. Thread one of the yarn tails from the shoulder of one panel through your yarn needle. Working from the outside edge of the shoulder seam towards the neck opening, use the mattress stitch to sew the bind-off edge of the front shoulder to the bind-off edge of the back shoulder on one side of your sweater.
To seam with mattress stitch when joining two bind-off edges together:
Take a stitch through the corner of each piece to begin. On each side, going perpendicular to the bind-off edge, there are short strands of yarn in the fabric that look like a ladder. These strands are right next to the bind-off edge. With your yarn needle always pointing the same direction when inserting into the fabric, insert your needle under the next two “ladder” strands along the bind-off edge on one panel, and pull your yarn through, leaving your stitches loose. Then, insert your needle under the next two “ladder” strands along the bind-off edge of the other panel, and pull your yarn through, leaving your stitches loose.
Continue stitching, alternating back and forth between the two bind-off edges, taking two “ladder” strands with each stitch. Keep your stitches loose. You can, however, pull the seaming yarn to tighten the stitches you have worked so far, if at any point you need more length in your seaming yarn.
When you reach the end of the seam, pull on your seaming yarn to close up the loose seaming stitches until the seam looks neat. Then, grasp the seam at both ends and stretch it out. This makes sure there is enough ease in the seaming yarn. Take one more stitch through both corners of the panels at the neck opening edge, and make a knot to tie off your seam.
Weave in the yarn tail. Repeat on the other shoulder, and sew the front shoulder to the back shoulder on the other side of your sweater, using one of the yarn tails. Tie off, and weave in the yarn tail.
To attach each sleeve:
Fold the top edge of the sleeve in half to find the halfway point along this edge. Use a locking stitch marker or safety pin to pin the halfway point along the top edge of the sleeve to the end of the shoulder seam that is along the outside edge of the sweater. Thread the yarn tail at the top edge of the sleeve through your yarn needle, and use the mattress stitch to seam the bind-off edge of the sleeve to the side edge of the body of the sweater.
To seam with mattress stitch when joining a bind-off edge to a side edge:
Make sure both pieces are laying flat, with the center point on the top edge of the sleeve aligned with the shoulder seam of the body panels. Take a stitch through the corner of the sleeve and through the point on the body panel where the corner of the sleeve lines up with the body panel.
On the sleeve edge, we will be working into the same kind of “ladder” strands of yarn as we stitched through on the shoulder seam. On the body panels, we will be working into the ends of the ridges of the garter stitch fabric.
With your yarn needle always pointing the same direction when inserting into the fabric, bring your yarn needle over to the sleeve edge, and pick up the next two “ladder” strands with your needle. Pull the needle through, leaving your stitches loose. Then, bring your yarn needle to the edge of the body panel, and pick up the rainbow-shaped strand of yarn that comes up to the edge of the fabric on the next garter ridge. Pull the needle through, leaving your stitches loose.
Continue stitching, alternating back and forth between the two edges, stitching through two “ladder” strands with each stitch on the sleeve edge, and one rainbow-shaped strand of yarn on the edge of the next garter ridge on the body panel. Keep your stitches loose. You can, however, pull the seaming yarn to tighten the stitches you have worked so far, if at any point you need more length in your seaming yarn.
When you reach the shoulder seam of the body panel and the halfway-point of the sleeve edge, from then on, the garter stitch fabric on the body panel will be oriented in the opposite direction. You will now see bowl-shaped strands of yarn on the ends of the garter ridges on the body panel, and work into those as you continue seaming the sleeve edge to the body panel. The pin aligning the sleeve with the body panel can be removed. You may choose to pin the remaining corner of the sleeve to the edge of the body panel while you stitch the rest of the seam.
When you reach the end of the seam, pull on your seaming yarn to close up the loose seaming stitches until the seam looks neat. Then, grasp the seam at both ends and stretch it out. This makes sure there is enough ease in the seaming yarn. Take one more stitch through the corner of the sleeve and the edge of the body panel, and make a knot to tie off your seam.
Weave in the yarn tail. Repeat to join the other sleeve to the other side of the sweater. Tie off, and weave in the yarn tail.
Side Seams:
Fold the piece at the shoulder seams so that the front panel is laying on top of the back panel, with the right side of the fabric facing out. Line up the cast on edge of the front panel with the cast on edge of the back panel. We will be stitching the front of the sweater to the back, working from the ribbing at the bottom of the sweater up to the underarm.
The first part of the side edges that we have to join is the ribbing. Because there is not an extra selvedge stitch in the ribbing, we will not use mattress stitch to sew the ribbing edges together. Instead, use a whip stitch to join the edge of the front ribbing to the edge of the back ribbing.
When you reach the garter stitch portion of the sweater, begin using the mattress stitch as follows.
To seam the side edges of garter stitch pieces with mattress stitch:
With your yarn needle always pointing the same direction when inserting into the fabric, insert the needle through the bowl-shaped strand of yarn on the edge of the next garter ridge on the panel that is on your right. Pull the needle through, leaving your stitches loose. Then, insert the needle through the rainbow-shaped strand of yarn on the edge of the next garter ridge on the panel that is on your left.
Continue stitching, alternating back and forth between the two edges, stitching through one bowl-shaped strand on the edge of the next garter ridge on the panel on your right, and one rainbow-shaped strand on the edge of the next garter ridge on the panel on your left. Keep your stitches loose. You can, however, pull the seaming yarn to tighten the stitches you have worked so far, if at any point you need more length in your seaming yarn.
When you reach the underarm, where the sleeve meets the body panels of the sweater, stop stitching. Pull on your seaming yarn to close up the loose seaming stitches until the seam looks neat. Then, grasp the seam at both ends and stretch it out. This makes sure there is enough ease in the seaming yarn. Take one more stitch through the point where the sleeve meets the body panel, and make a knot to tie off your seam.
Weave in the yarn tail. Repeat to join the side edges of the body panels on the other side of the sweater. Tie off, and weave in the yarn tail.
Sleeve Seams:
Fold the sleeve so that the two side edges of the sleeve meet, with the right side of the fabric facing out. Line up the bottom corners of the sleeve cuff. We will be stitching the sides of the sleeve panel together, working from the sleeve cuff ribbing up to the underarm.
Using the same techniques as described for the side seams, whip stitch the side edges of the cuff ribbing on the sleeve panel together. Then, continue stitching the rest of the seam with mattress stitch, just as you did for the side seams, until you reach the underarm.
When you reach the underarm, where the sleeve meets the body panels of the sweater, stop stitching. Pull on your seaming yarn to close up the loose seaming stitches until the seam looks neat. Then, grasp the seam at both ends and stretch it out. This makes sure there is enough ease in the seaming yarn. Take one more stitch through the point where the sleeve meets the body panel, and make a knot to tie off your seam.
Weave in the yarn tail. Repeat to join the side edges of the sleeve on the other side of the sweater. Tie off, and weave in the yarn tail.
Neck Ribbing
We are now going to pick up stitches around the neckline, with the sweater turned right-side-out, starting from the center back neck. You will need to use the magic loop method, looping the excess cord length of your circular needle out of the way, since the needle is longer than the circumference of the neckline.
(Stitches are picked up working from right to left. To pick up each stitch around the neck opening, insert your right needle tip under two strands of yarn along the edge of the fabric. Yarn over, and pull up a new loop.)
Start at the center back neck. You will be picking up stitches from right to left, in a clockwise direction around the neck. With Size 9 needle, pick up the next 6 (7, 7, 8, 8, 9, 9, 10, 10) bound-off stitches from the center section of the back neck. Pick up the next 4 bound-off stitches along the curve of the neck shaping. Pick up 7 evenly-spaced sts (1 st from the end of each garter ridge) along the side edge of the back neck shaping. Now you should have reached the shoulder seam.
Continuing around to the front neck, pick up 15 evenly-spaced sts (1 st from the end of each garter ridge) along the side edge of the front neck. Pick up the next 4 bound-off stitches along the curve of the neck shaping. Pick up the next 8 (10, 10, 12, 12, 14, 14, 16, 16) bound-off stitches along the center section of the front neck. Pick up the next 4 bound-off stitches along the curve of the neck shaping. Pick up 15 evenly-spaced sts (1 st from the end of each garter ridge) along the side edge of the front neck. Now you should have reached the other shoulder seam.
Working around the other side of the back neck, pick up 7 evenly-spaced sts (1 st from the end of each garter ridge) along the side edge of the back neck shaping. Pick up the next 4 bound-off stitches along the curve of the neck shaping. Pick up the remaining 6 (7, 7, 8, 8, 9, 9, 10, 10) bound-off stitches from the center section of the back neck. You should have reached the center back neck again, where you started.
You should have a total of 80 (84, 84, 88, 88, 92, 92, 96, 96) sts.
As you knit the neck ribbing, you’ll need to loop the excess needle cord out of the way. At the beginning of each round, slide the stitches around your circular needle so that the left needle has stitches sitting on it, ready to knit, and the right needle is hanging out, with the excess cord on the right-hand end of your needle. Loop the excess cord length on the right needle tip out of the way, place a stitch marker on your right needle, and begin knitting in the round as instructed below. You will need to slide the stitches around your circular needle again, so the excess cord length is on the right, and loop the excess cord out of the way to begin the next round. Be sure to slip the stitch marker at the beginning of each round.
For natural fibers, pin project out on foam blocking mats. Spray with water until fully saturated, allow to dry.
OR
For acrylic fibers, pin project out on an ironing board or several layers of towels. Hold a steaming iron 2-3” over the surface of the fabric, making sure all of the fabric is penetrated by the steam. Allow to cool / dry.
Enjoy your finished Basic Knit Pullover!
This pattern is intended for your personal use only. You may not share it, copy it, sell it, give it away, or mass-produce the finished product. However, you may sell the finished items on a small scale, as long as you convey in your item description that you used a Yay For Yarn pattern.
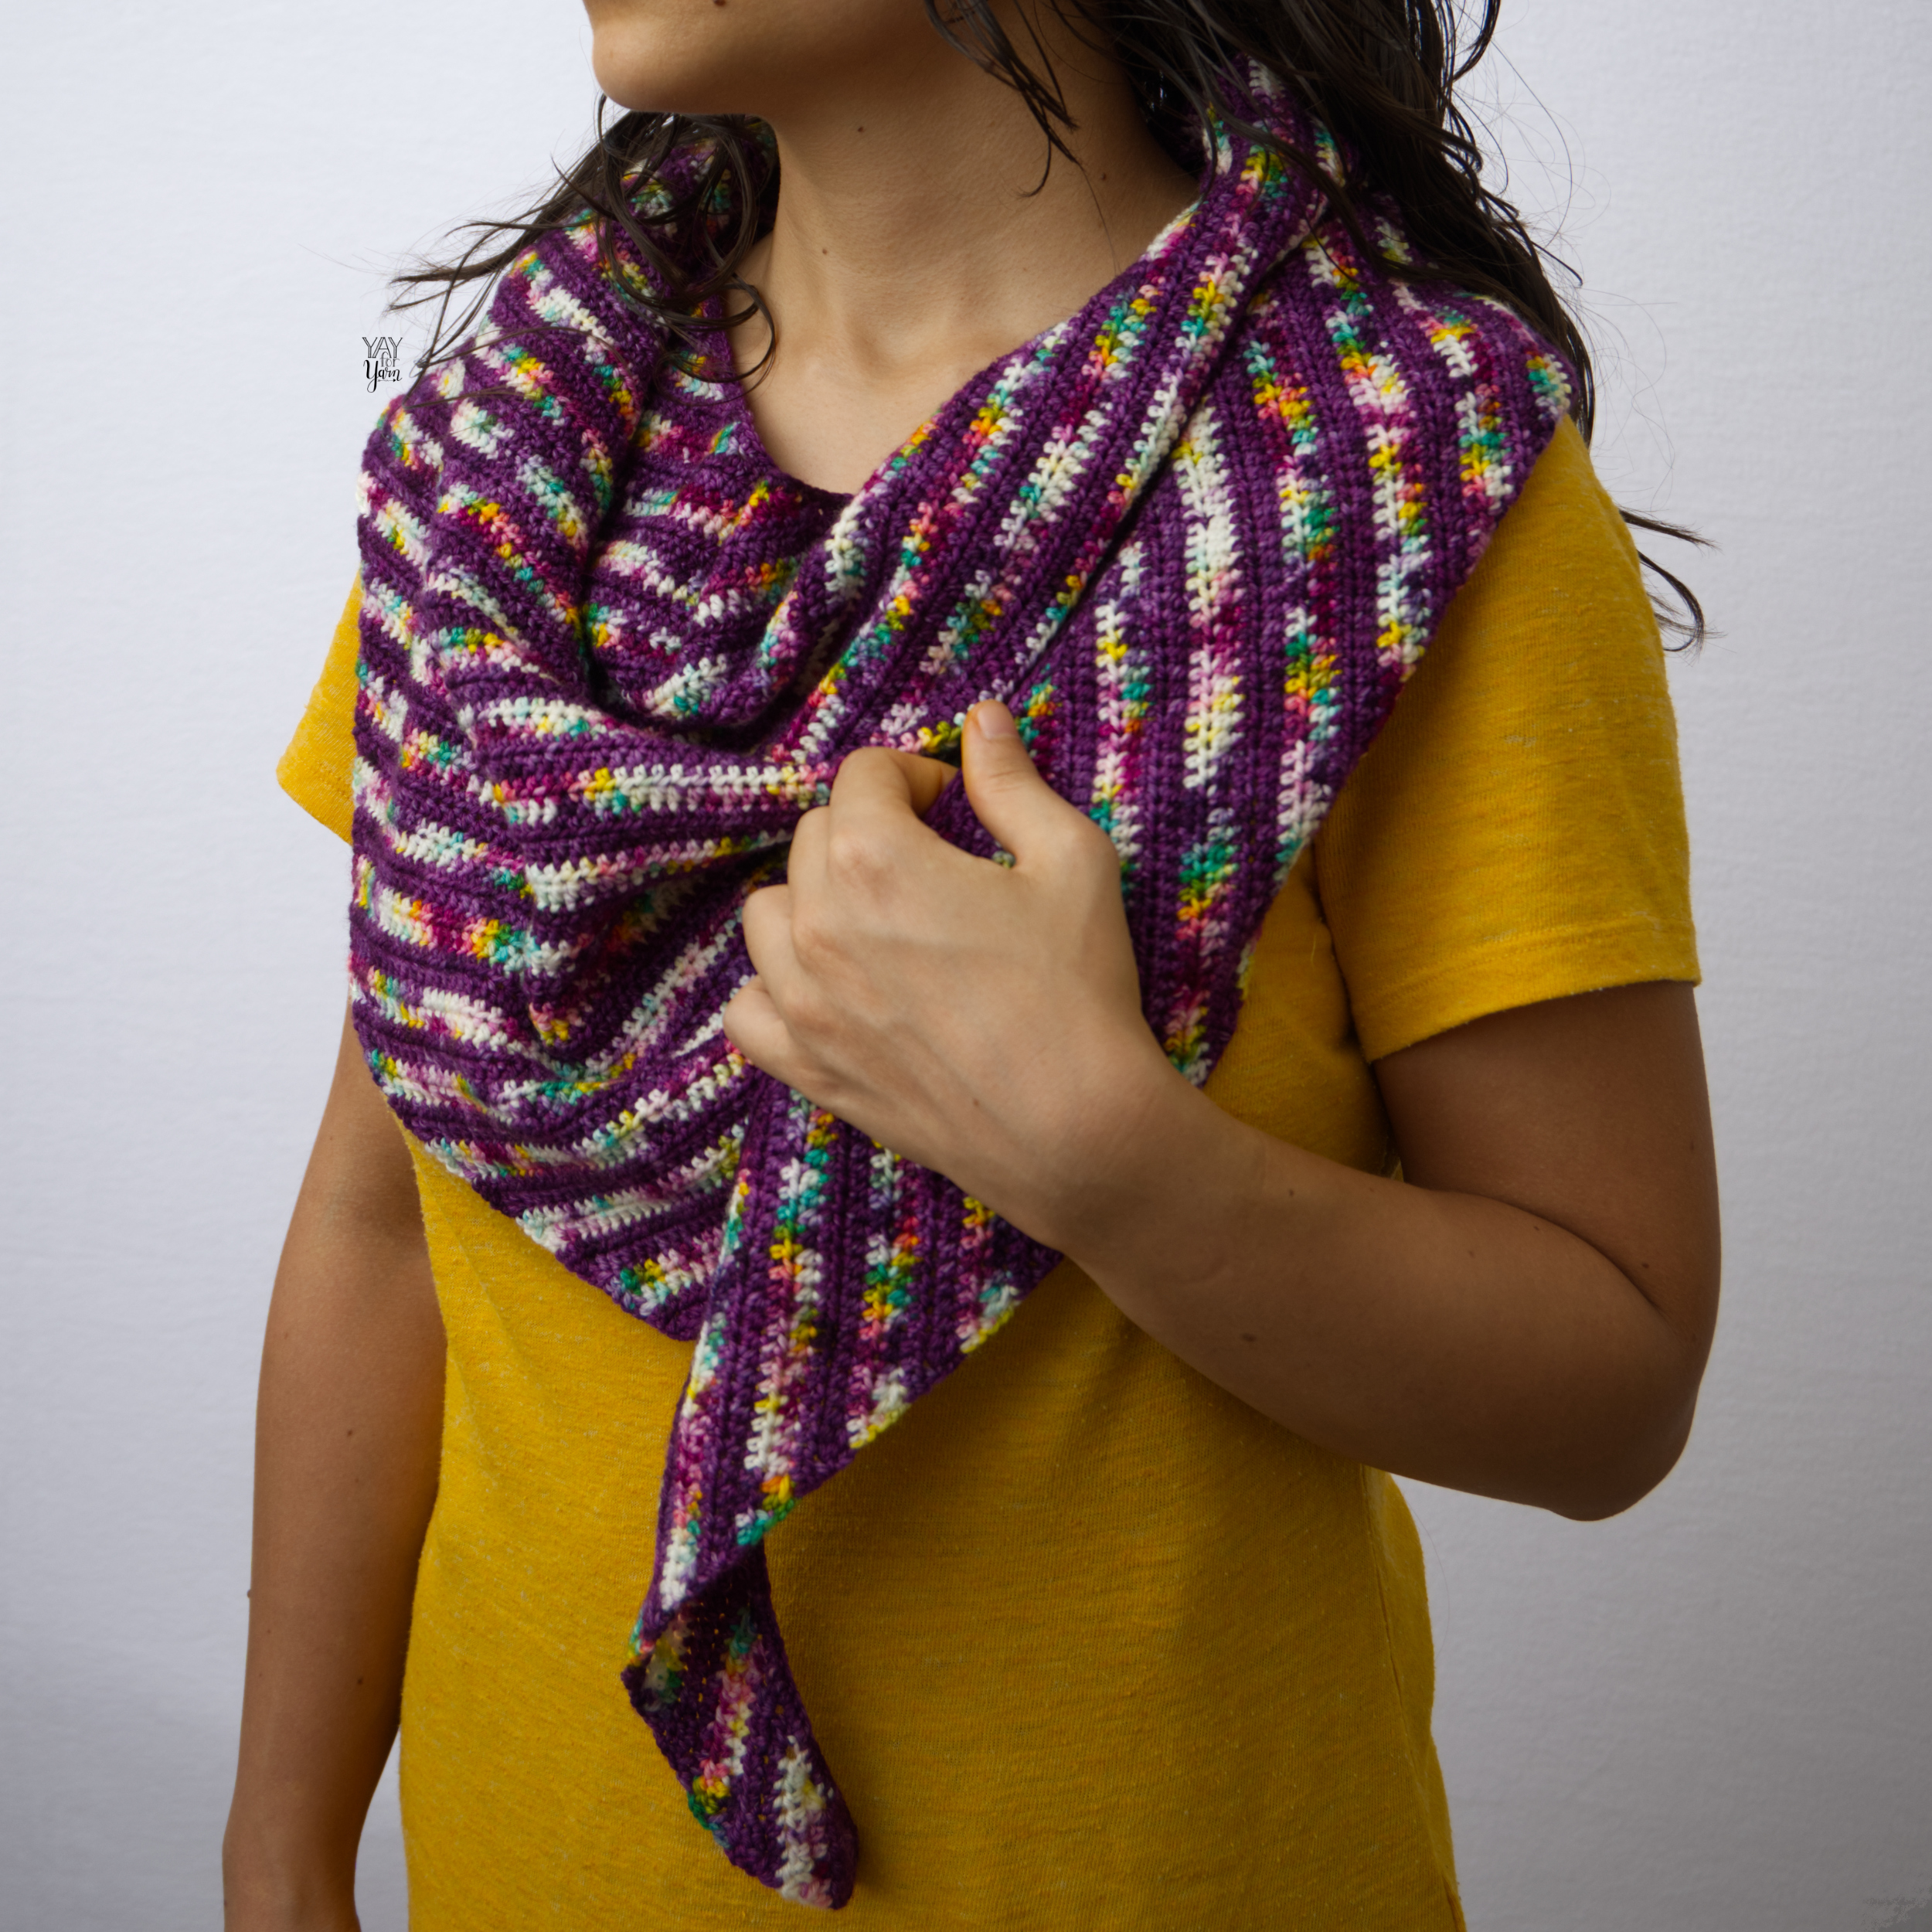
If you have a couple skeins of hand-dyed or gradient cake yarns in your stash and you don't know what to do with them, this shawl is the perfect project! Make your own two-color boomerang shawl with this free crochet shawl pattern and video tutorial.
Looking for the perfect gift for a knitter or crocheter, or simply shopping for yourself? You're in the right place! I'm highlighting some of my favorite unique and useful gifts for yarn crafters.
Of course, gift cards to yarn stores are always a good gift idea 😉, but hand-picked gifts can also be very special. These gift ideas are handmade items from various sellers on Etsy, so are also supporting small handcrafted businesses.
Perhaps some of the items below will spark other ideas for a gift a yarn-crafting friend would love. You can browse many other handmade items that would make great gifts on the Etsy marketplace.
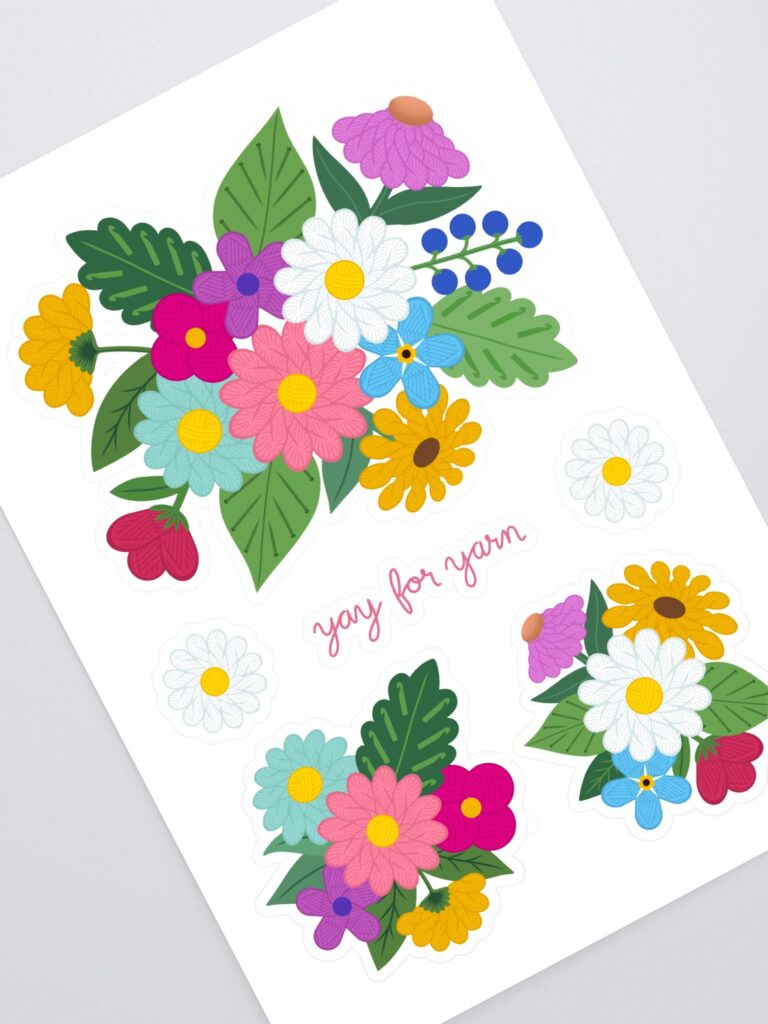
Cute Knit & Crochet Stickers
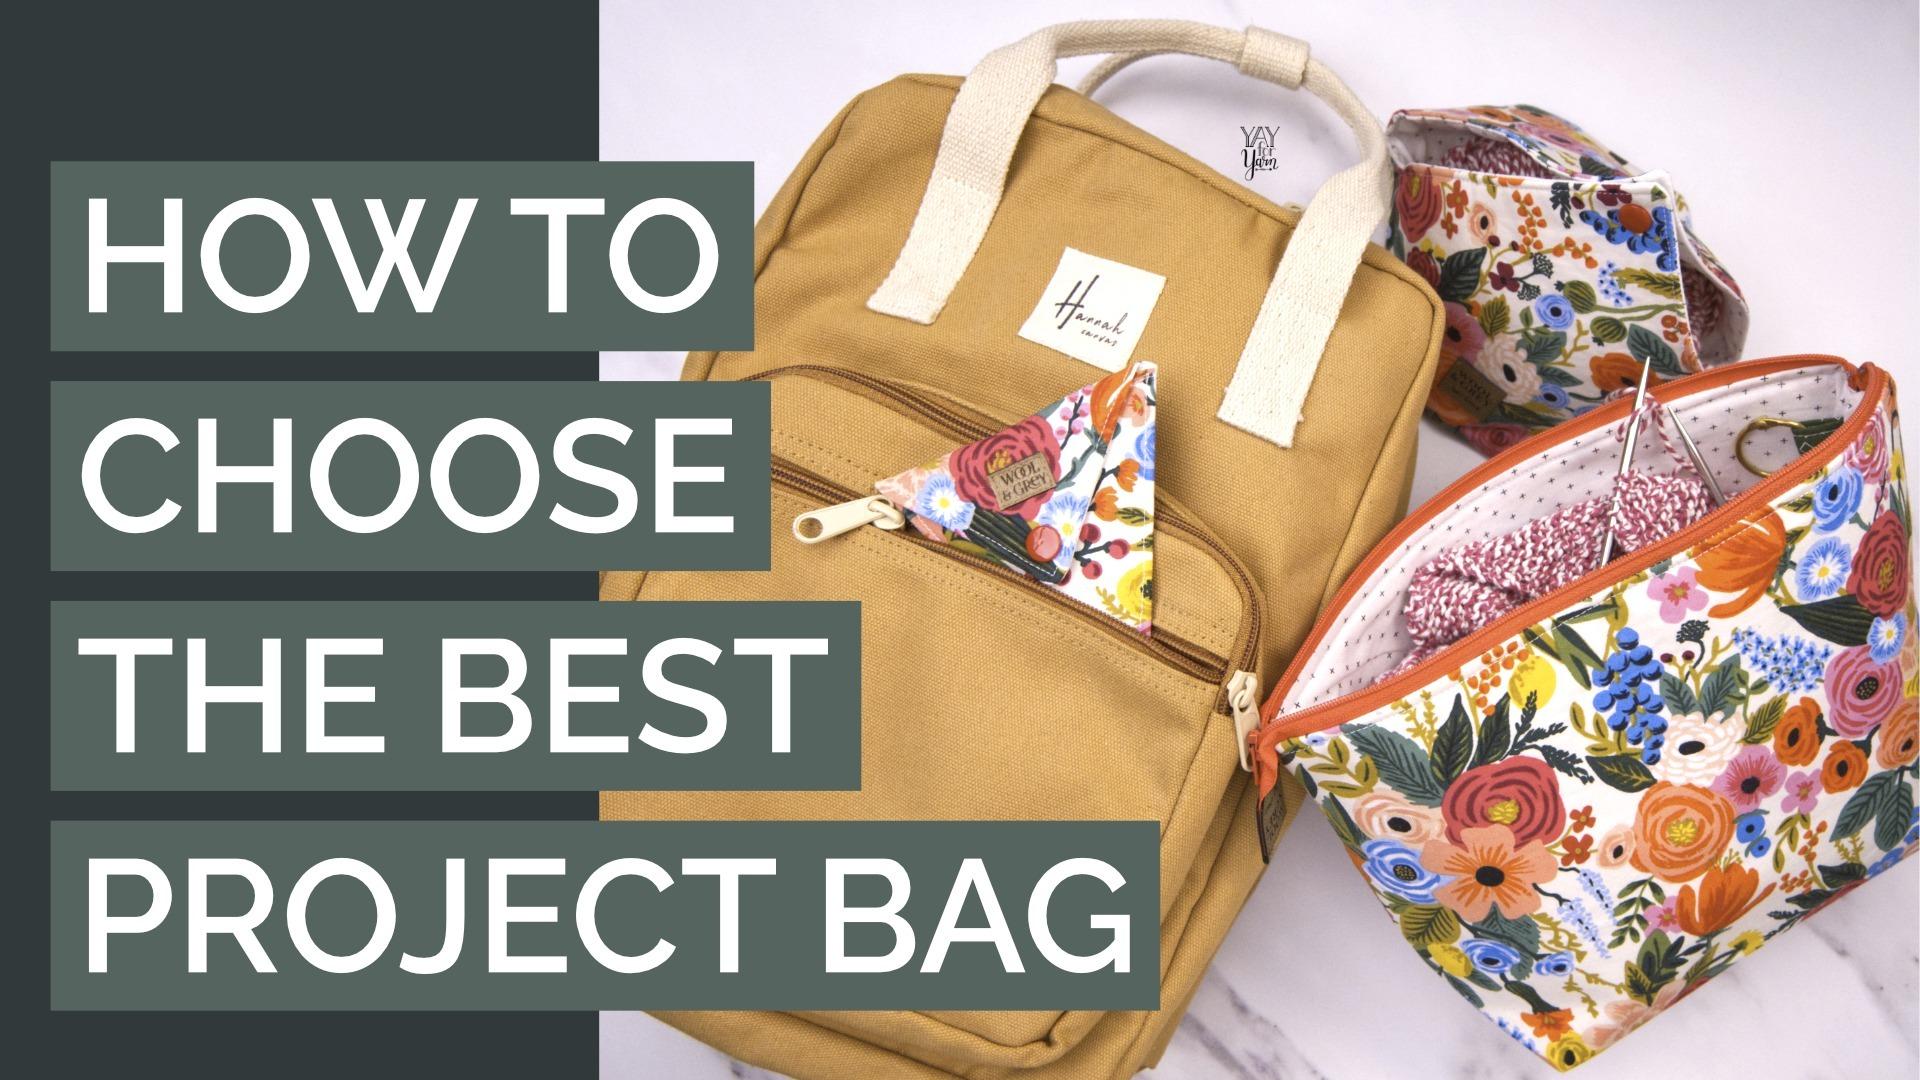
Knitting & Crochet Project Bags
I love project bags, and while any bag will work for carrying a project, there are features I look for and features I avoid when choosing a project bag. You can check out my best tips for choosing the right project bag here, or simply shop a few of my favorite bag styles below.
Stitch Markers
Novelty Yarn Mugs
Hand-Dyed Yarns
Knit & Crochet Notions
Curated Gift Boxes for Knitters & Crocheters
Do you have any favorite items you like to give as gifts to yarn crafting friends? Let me know in the comments!
I hope you'll find some of these suggestions helpful!
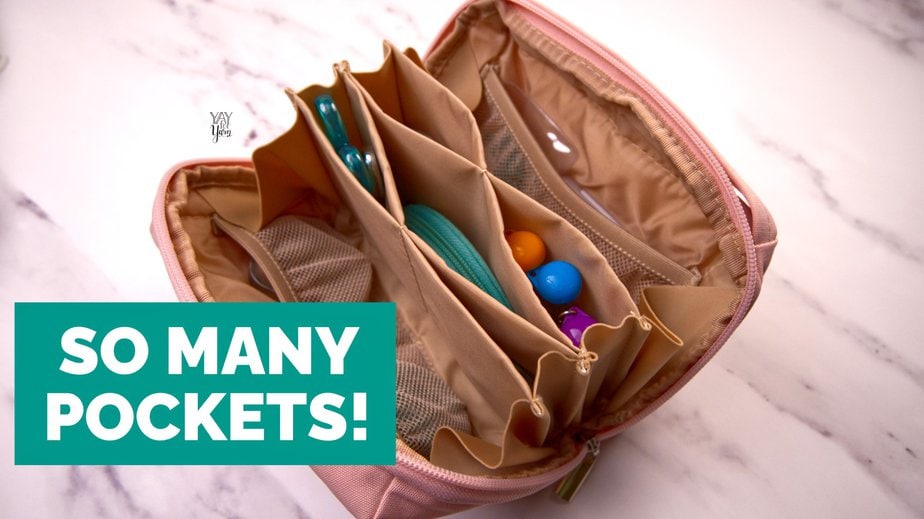
No more losing yarn needles & stitch markers in your project bag! This organizer will make sure all your small knitting & crochet items are easy to find.
Whether you want to travel with your knitting & crochet projects, or just need to keep them organized, good project bags are an essential part of a yarn crafter's toolkit. These tips will help you find the right project bag for you.
Interchangeable knitting needles are useful, convenient, and can work well for nearly any project. Here are my favorite tips for using these versatile needles.
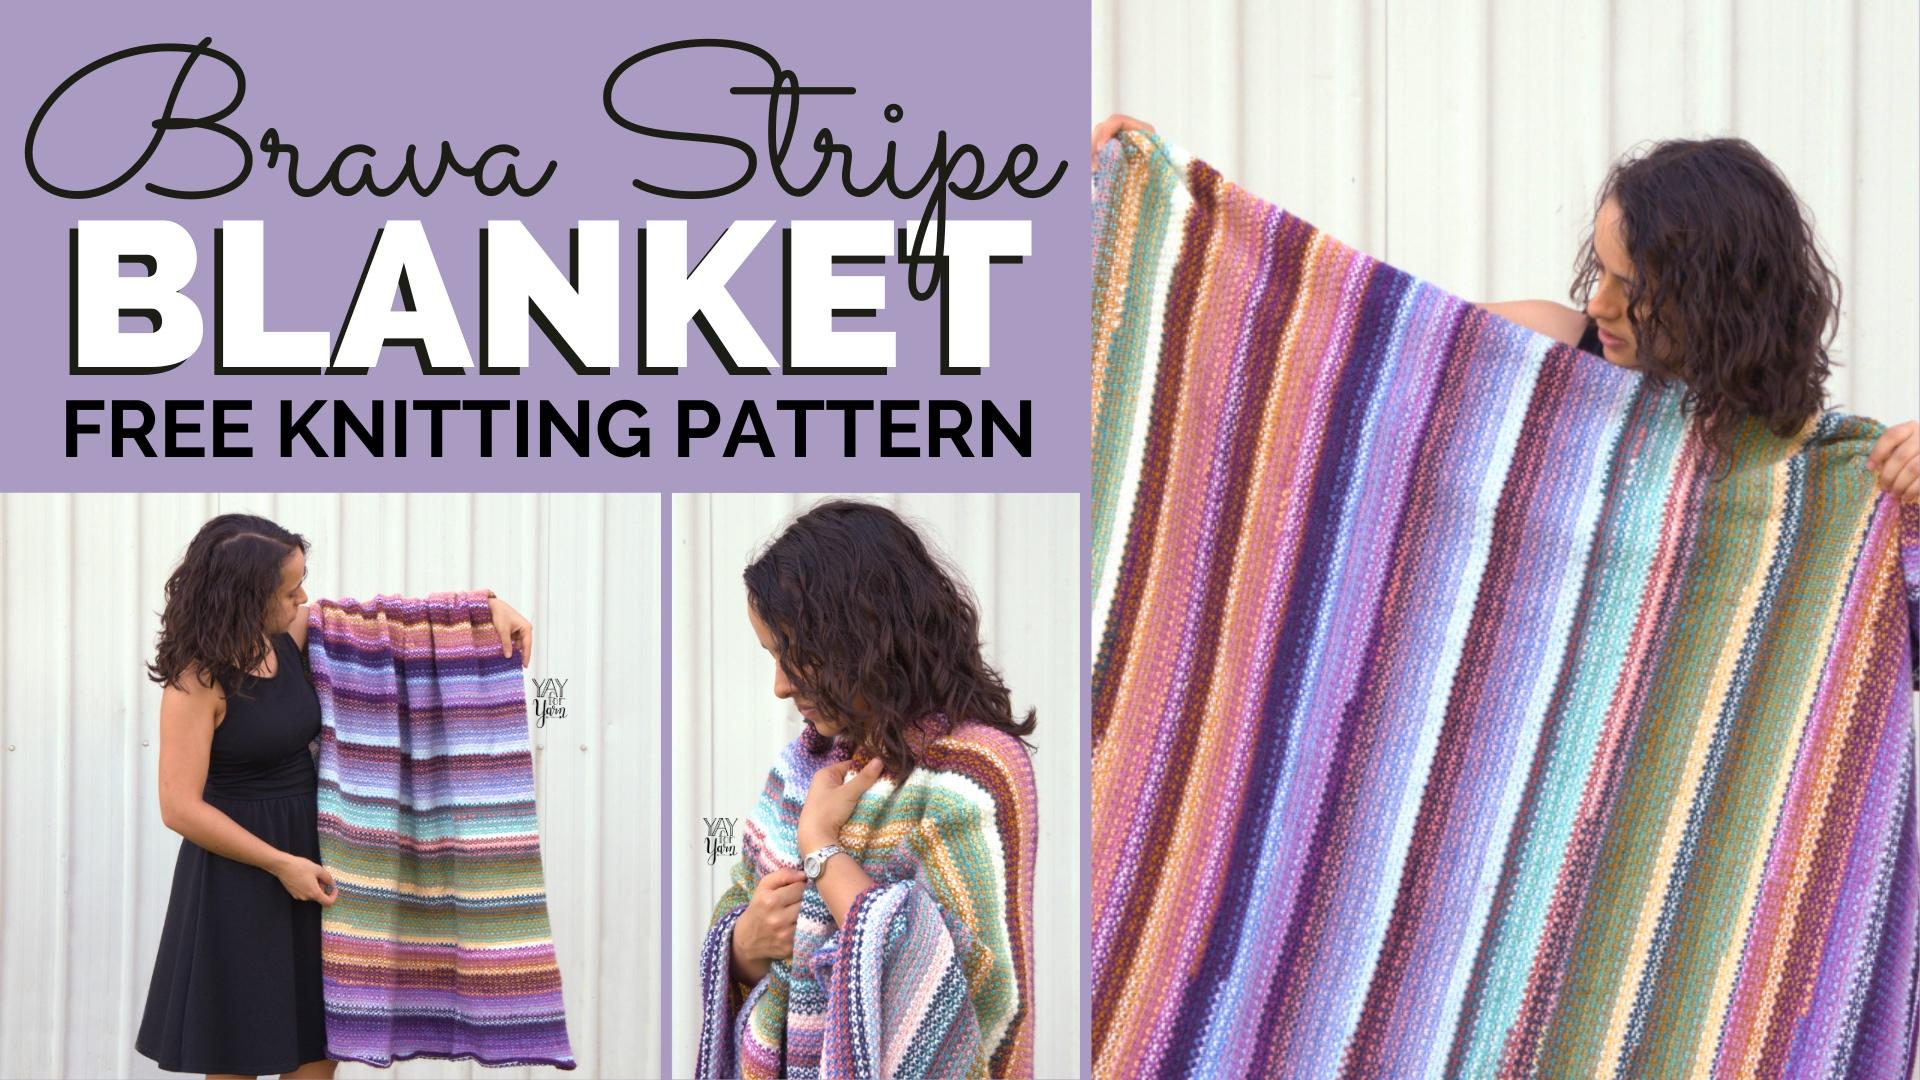
This easy striped blanket pattern blends multiple self-striping yarns (or lots of scrap yarn) together for a colorful, woven look. Start knitting this easy afghan today with this free pattern & video tutorial.
Laurel Hill sent me a few skeins of their exclusive, in-house yarn to try out, and I really enjoyed working with it! Read on to learn what I thought of this yarn and what I made from it.
Looking for a light, comfy pullover for that in-between weather when it's cool, but not freezing? Don't enjoy having to sew up a lot of seams in your projects? The Round Yoke Sweater is the free crochet pattern you're looking for.
Ideal for layering, this simple sweater is a cool-weather wardrobe staple. Throw it on with your favorite pair of jeans, or layer it over a tank with a flowy skirt. Featuring ribbing at the neckline, hem, and cuffs, and a simple stitch technique throughout, this sweater can add texture to an outfit without competing with other prints or accessories.
Compared to some methods for making crochet cardigans and pullover sweaters, this is a relatively easy crochet sweater pattern. It is crocheted in the round from the top down, with minimal seaming. There are only 4 very short seams in the entire project, each less than 2 inches long.
Another bonus of making a sweater from the top down in one piece is that you can try it on as you go! Ever seen those sweater-in-progress videos on Instagram where people try on their partially-finished sweaters? Those are often top-down sweaters like this one.
How to Choose the Best Yarn for a Women’s Pullover Sweater
This cozy sweater crochet pattern calls for #2 Fine / Sport Weight yarn.
I used WeCrochet Upcycle Alpaca Blend Sport for my Round Yoke Sweater. This lightweight yarn is a soft blend of 33% Alpaca, 34% Wool, and 33% Acrylic. The recycled fibers in Upcycle Alpaca give it a lovely heathered look, adding a bit of visual texture.
(The Upcycle Alpaca yarn is also available in worsted weight, but for this pattern, you'll need the sport weight version.)
Feel free to choose a yarn with a different fiber content if you like, as long as it is #2 Fine / Sport Weight.
For a similar drape and texture to the sweater shown in the photos, I would suggest using an acrylic or animal fiber yarn for this project. Plant fiber yarns, like linen, bamboo, or cotton yarn could also be used, but the resulting fabric texture and drape will be different.
When selecting the yarn you want to use for this pattern, make sure the yarn label says it is #2 Sport Weight. Then, purchase enough skeins of the yarn you want to use so that you have at least the total number of yards required in the pattern for the size you are making.
How do I Choose a Size?
The Round Yoke Sweater crochet pattern includes instructions for 9 sizes, from a women’s size X-Small to 5X. (Pattern is written for XS, S, M, L, XL, 2XL, 3XL, 4XL, and 5XL.) To decide which size you want to make, you’ll need to measure around the fullest part of the bust. Then, follow the instructions in the “Sizing” section of the pattern to select the size according to the wearer’s bust measurement.
Please note that the pullover length will fall differently on individuals of different heights. To see how long the sweater will fall, measure the back length measurement against the wearer.
Check out these size-inclusive women’s crochet sweater and cardigan patterns!
This crochet sweater pattern is labeled “Intermediate” for the skill level, but it is made primarily from basic stitches. The pattern may be appropriate for some beginner crocheters who are familiar with pattern reading and a few special techniques.
To make this project, you’ll need to know how to work the basic crochet stitches, increase and decrease, work in the round, and work in a the back loop only and front loop only. Many crochet sweater patterns are made with the double crochet stitch (dc), but I chose to use front-loop-only half-double crochet to give the sweater a soft drape and subtle texture.
Ready to get started? Let's crochet the Round Yoke Sweater!
- This sweater has a classic fit, with 4-5” (10.2-12.7 cm) of positive ease. If you are between sizes, size up if you want a looser-fit sweater, or size down if you want a more fitted sweater.
- Measure the bust of the wearer, and choose the size that is closest to the wearer’s bust measurement, under the title, “To Fit Bust”.
- Instructions and yarn requirements for size X-Small are given outside the parentheses, with Small, Medium, Large, X-Large, 2X, 3X, 4X, and 5X given inside the parentheses, like this:
- When only one number is given, it applies to all sizes.
- When a set of instructions does not apply to all sizes, the numbers that would normally be given for the sizes that the instructions do not apply to will be replaced with dashes, like this:
Please Note: Pullover length will fall differently on individuals of different heights. To see where the hem of the sweater will fall, measure the back length measurement against the wearer.
You Will Need:
1017 (1127, 1278, 1362, 1476, 1588, 1609, 1640, 1660) yards of #2 Sport Weight Yarn (I used WeCrochet Upcycle Alpaca Blend Sport in Seaglass, 33% Alpaca, 34% Wool, 33% Acrylic, 3.5 oz / 100 g or 273 yds / 250 m per skein, 4 (5, 5, 5, 6, 6, 6, 6, 7) skeins
Remove hook from current loop. Insert hook from back to front through the top of the first stitch from beg of round. Place original loop back on hook. Pull loop through the st from front to back.
Hdc2tog:
*Yarn over, insert hook into nxt st, yarn over, pull up a loop.* Repeat from * to * a second time. Yarn over, pull through all 5 loops on hook.
Pattern for Gauge Swatch
Ch 31.
Row 1: Sk 1 ch, hdc in 2nd ch from hook. Hdc in ea ch across. <You should have 30 sts, not including ch that was skipped at beg of row.>
Row 2-16: Ch 1, turn. Hdc in FLO of same st, hdc in FLO of ea st across. <You should have 30 sts, not including beg ch.>
Tie off, block, and measure gauge. Adjust your hook size as needed to match the required gauge measurements.
Sweater Instructions
Notes: Pullover is worked from the top down, with a circular yoke. We will begin by working the ribbing around the neck, then gradually increasing stitches in the circle to create the yoke. Once we have finished the yoke, we will separate the sleeve stitches from the body stitches, and continue adding length to the body of the sweater. A band of ribbing is then added to the hem. Then, we will crochet around the sleeve openings to add our sleeves.
Neck Ribbing
The strip of neck ribbing is worked sideways, and then we will sew the ends of the strip together to form a circle. Along one edge of the work, we will begin our rows with ch 1. Along the other edge, we will not ch 1 at the beginnings of the rows. This will help our strip of ribbing to curve around the neck.
Leaving a tail at least 9” / 23 cm long, ch 9.
Row 1: Sk first ch, sc in 2nd ch from hook, sc in ea ch across. <You should have 8 sts, not including skipped ch.>
Row 2: Turn (do not ch 1). Sc in BLO of same st, sc in BLO of nxt 7 sts. <You should have 8 sts>
Row 3: Ch 1, turn. Sc in BLO of same st, sc in BLO of nxt 7 sts. <You should have 8 sts, not including beg ch.>
Rows 4-135: Repeat Rows 2-3.
Row 136: Repeat Row 2. Do not tie off.
Thread the yarn tail from the beginning of the ribbing through your yarn needle. Lay out the strip of neck ribbing so that it forms a circle. Use your yarn needle to sew the foundation chain edge of the piece to the edge of Row 136. Tie off the seaming yarn and weave in the yarn tail.
Sweater Yoke
We will now work into the ends of the rows around the outside edge of the neck ribbing to begin our yoke (the edge where we began our ribbing rows with “ch 1”).
Round 1: Stretch the loop on your hook slightly, sc in the end of the last row of the neck ribbing. Sc in the end of each row of the neck ribbing all the way around. Join with invslst in first sc of round. <You should have 136 sts, not including beg ch-sp or invslst.>
Round 2: Turn. Ch 1, pull the loop on the hook to tighten the chain a bit, then ch 1 again. Hdc in FLO of first st. Hdc in FLO of nxt 15 sts, 2 hdc in FLO of nxt st. *Hdc in FLO of nxt 16 sts, 2 hdc in FLO of nxt st.* Repeat from *to* 6 more times. Join with invslst in 1st hdc of round. <You should have 144 sts, not including beg ch-sp or invslst.>
Round 3: Turn. Ch 1, pull the loop on the hook to tighten the chain a bit, then ch 1 again. Hdc in FLO of first st. Hdc in FLO of nxt 16 sts, 2 hdc in FLO of nxt st. *Hdc in FLO of nxt 17 sts, 2 hdc in FLO of nxt st.* Repeat from *to* 6 more times. Join with invslst in 1st hdc of round. <You should have 152 sts, not including beg ch-sp or invslst.>
Round 4: Turn. Ch 1, pull the loop on the hook to tighten the chain a bit, then ch 1 again. Hdc in FLO of first st. Hdc in FLO of nxt 17 sts, 2 hdc in FLO of nxt st. *Hdc in FLO of nxt 18 sts, 2 hdc in FLO of nxt st.* Repeat from *to* 6 more times. Join with invslst in 1st hdc of round. <You should have 160 sts, not including beg ch-sp or invslst.>
Round 5: Turn. Ch 1, pull the loop on the hook to tighten the chain a bit, then ch 1 again. Hdc in FLO of first st. Hdc in FLO of nxt 18 sts, 2 hdc in FLO of nxt st. *Hdc in FLO of nxt 19 sts, 2 hdc in FLO of nxt st.* Repeat from *to* 6 more times. Join with invslst in 1st hdc of round. <You should have 168 sts, not including beg ch-sp or invslst.>
Round 6: Turn. Ch 1, pull the loop on the hook to tighten the chain a bit, then ch 1 again. Hdc in FLO of first st. Hdc in FLO of nxt 19 sts, 2 hdc in FLO of nxt st. *Hdc in FLO of nxt 20 sts, 2 hdc in FLO of nxt st.* Repeat from *to* 6 more times. Join with invslst in 1st hdc of round. <You should have 176 sts, not including beg ch-sp or invslst.>
Round 7: Turn. Ch 1, pull the loop on the hook to tighten the chain a bit, then ch 1 again. Hdc in FLO of first st. Hdc in FLO of nxt 20 sts, 2 hdc in FLO of nxt st. *Hdc in FLO of nxt 21 sts, 2 hdc in FLO of nxt st.* Repeat from *to* 6 more times. Join with invslst in 1st hdc of round. <You should have 184 sts, not including beg ch-sp or invslst.>
Round 8: Turn. Ch 1, pull the loop on the hook to tighten the chain a bit, then ch 1 again. Hdc in FLO of first st. Hdc in FLO of nxt 21 sts, 2 hdc in FLO of nxt st. *Hdc in FLO of nxt 22 sts, 2 hdc in FLO of nxt st.* Repeat from *to* 6 more times. Join with invslst in 1st hdc of round. <You should have 192 sts, not including beg ch-sp or invslst.>
Round 9: Turn. Ch 1, pull the loop on the hook to tighten the chain a bit, then ch 1 again. Hdc in FLO of first st. Hdc in FLO of nxt 22 sts, 2 hdc in FLO of nxt st. *Hdc in FLO of nxt 23 sts, 2 hdc in FLO of nxt st.* Repeat from *to* 6 more times. Join with invslst in 1st hdc of round. <You should have 200 sts, not including beg ch-sp or invslst.>
For size X-Small, stop here. Skip rounds 10-32 and go to Round 33.
Round 10: Turn. Ch 1, pull the loop on the hook to tighten the chain a bit, then ch 1 again. Hdc in FLO of first st. Hdc in FLO of nxt 23 sts, 2 hdc in FLO of nxt st. *Hdc in FLO of nxt 24 sts, 2 hdc in FLO of nxt st.* Repeat from *to* 6 more times. Join with invslst in 1st hdc of round. <You should have 208 sts, not including beg ch-sp or invslst.>
Round 11: Turn. Ch 1, pull the loop on the hook to tighten the chain a bit, then ch 1 again. Hdc in FLO of first st. Hdc in FLO of nxt 24 sts, 2 hdc in FLO of nxt st. *Hdc in FLO of nxt 25 sts, 2 hdc in FLO of nxt st.* Repeat from *to* 6 more times. Join with invslst in 1st hdc of round. <You should have 216 sts, not including beg ch-sp or invslst.>
Round 12: Turn. Ch 1, pull the loop on the hook to tighten the chain a bit, then ch 1 again. Hdc in FLO of first st. Hdc in FLO of nxt 25 sts, 2 hdc in FLO of nxt st. *Hdc in FLO of nxt 26 sts, 2 hdc in FLO of nxt st.* Repeat from *to* 6 more times. Join with invslst in 1st hdc of round. <You should have 224 sts, not including beg ch-sp or invslst.>
For size Small, stop here. Skip rounds 13-32 and go to Round 33.
Round 13: Turn. Ch 1, pull the loop on the hook to tighten the chain a bit, then ch 1 again. Hdc in FLO of first st. Hdc in FLO of nxt 26 sts, 2 hdc in FLO of nxt st. *Hdc in FLO of nxt 27 sts, 2 hdc in FLO of nxt st.* Repeat from *to* 6 more times. Join with invslst in 1st hdc of round. <You should have 232 sts, not including beg ch-sp or invslst.>
Round 14: Turn. Ch 1, pull the loop on the hook to tighten the chain a bit, then ch 1 again. Hdc in FLO of first st. Hdc in FLO of nxt 27 sts, 2 hdc in FLO of nxt st. *Hdc in FLO of nxt 28 sts, 2 hdc in FLO of nxt st.* Repeat from *to* 6 more times. Join with invslst in 1st hdc of round. <You should have 240 sts, not including beg ch-sp or invslst.>
Round 15: Turn. Ch 1, pull the loop on the hook to tighten the chain a bit, then ch 1 again. Hdc in FLO of first st. Hdc in FLO of nxt 28 sts, 2 hdc in FLO of nxt st. *Hdc in FLO of nxt 29 sts, 2 hdc in FLO of nxt st.* Repeat from *to* 6 more times. Join with invslst in 1st hdc of round. <You should have 248 sts, not including beg ch-sp or invslst.>
For size Medium, stop here. Skip rounds 16-32 and go to Round 33.
Round 16: Turn. Ch 1, pull the loop on the hook to tighten the chain a bit, then ch 1 again. Hdc in FLO of first st. Hdc in FLO of nxt 29 sts, 2 hdc in FLO of nxt st. *Hdc in FLO of nxt 30 sts, 2 hdc in FLO of nxt st.* Repeat from *to* 6 more times. Join with invslst in 1st hdc of round. <You should have 256 sts, not including beg ch-sp or invslst.>
Round 17: Turn. Ch 1, pull the loop on the hook to tighten the chain a bit, then ch 1 again. Hdc in FLO of first st. Hdc in FLO of nxt 30 sts, 2 hdc in FLO of nxt st. *Hdc in FLO of nxt 31 sts, 2 hdc in FLO of nxt st.* Repeat from *to* 6 more times. Join with invslst in 1st hdc of round. <You should have 264 sts, not including beg ch-sp or invslst.>
For size Large, stop here. Skip rounds 18-32 and go to Round 33.
Round 18: Turn. Ch 1, pull the loop on the hook to tighten the chain a bit, then ch 1 again. Hdc in FLO of first st. Hdc in FLO of nxt 31 sts, 2 hdc in FLO of nxt st. *Hdc in FLO of nxt 32 sts, 2 hdc in FLO of nxt st.* Repeat from *to* 6 more times. Join with invslst in 1st hdc of round. <You should have 272 sts, not including beg ch-sp or invslst.>
Round 19: Turn. Ch 1, pull the loop on the hook to tighten the chain a bit, then ch 1 again. Hdc in FLO of first st. Hdc in FLO of nxt 32 sts, 2 hdc in FLO of nxt st. *Hdc in FLO of nxt 33 sts, 2 hdc in FLO of nxt st.* Repeat from *to* 6 more times. Join with invslst in 1st hdc of round. <You should have 280 sts, not including beg ch-sp or invslst.>
Round 20: Turn. Ch 1, pull the loop on the hook to tighten the chain a bit, then ch 1 again. Hdc in FLO of first st. Hdc in FLO of nxt 33 sts, 2 hdc in FLO of nxt st. *Hdc in FLO of nxt 34 sts, 2 hdc in FLO of nxt st.* Repeat from *to* 6 more times. Join with invslst in 1st hdc of round. <You should have 288 sts, not including beg ch-sp or invslst.>
For size X-Large, stop here. Skip rounds 21-32 and go to Round 33.
Round 21: Turn. Ch 1, pull the loop on the hook to tighten the chain a bit, then ch 1 again. Hdc in FLO of first st. Hdc in FLO of nxt 34 sts, 2 hdc in FLO of nxt st. *Hdc in FLO of nxt 35 sts, 2 hdc in FLO of nxt st.* Repeat from *to* 6 more times. Join with invslst in 1st hdc of round. <You should have 296 sts, not including beg ch-sp or invslst.>
Round 22: Turn. Ch 1, pull the loop on the hook to tighten the chain a bit, then ch 1 again. Hdc in FLO of first st. Hdc in FLO of nxt 35 sts, 2 hdc in FLO of nxt st. *Hdc in FLO of nxt 36 sts, 2 hdc in FLO of nxt st.* Repeat from *to* 6 more times. Join with invslst in 1st hdc of round. <You should have 304 sts, not including beg ch-sp or invslst.>
Round 23: Turn. Ch 1, pull the loop on the hook to tighten the chain a bit, then ch 1 again. Hdc in FLO of first st. Hdc in FLO of nxt 36 sts, 2 hdc in FLO of nxt st. *Hdc in FLO of nxt 37 sts, 2 hdc in FLO of nxt st.* Repeat from *to* 6 more times. Join with invslst in 1st hdc of round. <You should have 312 sts, not including beg ch-sp or invslst.>
For size 2X, stop here. Skip rounds 24-32 and go to Round 34.
Round 24: Turn. Ch 1, pull the loop on the hook to tighten the chain a bit, then ch 1 again. Hdc in FLO of first st. Hdc in FLO of nxt 37 sts, 2 hdc in FLO of nxt st. *Hdc in FLO of nxt 38 sts, 2 hdc in FLO of nxt st.* Repeat from *to* 6 more times. Join with invslst in 1st hdc of round. <You should have 320 sts, not including beg ch-sp or invslst.>
Round 25: Turn. Ch 1, pull the loop on the hook to tighten the chain a bit, then ch 1 again. Hdc in FLO of first st. Hdc in FLO of nxt 38 sts, 2 hdc in FLO of nxt st. *Hdc in FLO of nxt 39 sts, 2 hdc in FLO of nxt st.* Repeat from *to* 6 more times. Join with invslst in 1st hdc of round. <You should have 328 sts, not including beg ch-sp or invslst.>
Round 26: Turn. Ch 1, pull the loop on the hook to tighten the chain a bit, then ch 1 again. Hdc in FLO of first st. Hdc in FLO of nxt 39 sts, 2 hdc in FLO of nxt st. *Hdc in FLO of nxt 40 sts, 2 hdc in FLO of nxt st.* Repeat from *to* 6 more times. Join with invslst in 1st hdc of round. <You should have 336 sts, not including beg ch-sp or invslst.>
For size 3X, stop here. Skip rounds 27-32 and go to Round 34.
Round 27: Turn. Ch 1, pull the loop on the hook to tighten the chain a bit, then ch 1 again. Hdc in FLO of first st. Hdc in FLO of nxt 40 sts, 2 hdc in FLO of nxt st. *Hdc in FLO of nxt 41 sts, 2 hdc in FLO of nxt st.* Repeat from *to* 6 more times. Join with invslst in 1st hdc of round. <You should have 344 sts, not including beg ch-sp or invslst.>
Round 28: Turn. Ch 1, pull the loop on the hook to tighten the chain a bit, then ch 1 again. Hdc in FLO of first st. Hdc in FLO of nxt 41 sts, 2 hdc in FLO of nxt st. *Hdc in FLO of nxt 42 sts, 2 hdc in FLO of nxt st.* Repeat from *to* 6 more times. Join with invslst in 1st hdc of round. <You should have 352 sts, not including beg ch-sp or invslst.>
Round 29: Turn. Ch 1, pull the loop on the hook to tighten the chain a bit, then ch 1 again. Hdc in FLO of first st. Hdc in FLO of nxt 42 sts, 2 hdc in FLO of nxt st. *Hdc in FLO of nxt 43 sts, 2 hdc in FLO of nxt st.* Repeat from *to* 6 more times. Join with invslst in 1st hdc of round. <You should have 360 sts, not including beg ch-sp or invslst.>
Round 30: Turn. Ch 1, pull the loop on the hook to tighten the chain a bit, then ch 1 again. Hdc in FLO of first st. Hdc in FLO of nxt 43 sts, 2 hdc in FLO of nxt st. *Hdc in FLO of nxt 44 sts, 2 hdc in FLO of nxt st.* Repeat from *to* 6 more times. Join with invslst in 1st hdc of round. <You should have 368 sts, not including beg ch-sp or invslst.>
For size 4X, stop here. Skip rounds 31-32 and go to Round 34.
For size 5X only:
Round 31: Turn. Ch 1, pull the loop on the hook to tighten the chain a bit, then ch 1 again. Hdc in FLO of first st. Hdc in FLO of nxt 44 sts, 2 hdc in FLO of nxt st. *Hdc in FLO of nxt 45 sts, 2 hdc in FLO of nxt st.* Repeat from *to* 6 more times. Join with invslst in 1st hdc of round. <You should have 376 sts, not including beg ch-sp or invslst.>
Round 32: Turn. Ch 1, pull the loop on the hook to tighten the chain a bit, then ch 1 again. Hdc in FLO of first st. Hdc in FLO of nxt 45 sts, 2 hdc in FLO of nxt st. *Hdc in FLO of nxt 46 sts, 2 hdc in FLO of nxt st.* Repeat from *to* 6 more times. Join with invslst in 1st hdc of round. <You should have 384 sts, not including beg ch-sp or invslst.>
For sizes X-Small, Small, Medium, Large, and X-Large:
Round 33: Turn. Ch 1, pull the loop on the hook to tighten the chain a bit, then ch 1 again. Hdc in FLO of first st. Hdc in FLO of ea st around. Join with invslst in 1st hdc of round. <You should have 200 (224, 248, 264, 288, -, -, -, -) sts, not including beg ch-sp or invslst.>
Repeat Round 33 another 7 (5, 3, 2, 0, -, -, -, -) more times.
Body of Sweater
For all sizes:
Round 34: Turn. Ch 1, pull the loop on the hook to tighten the chain a bit, then ch 1 again. Hdc in FLO of first st. Hdc in FLO of nxt 30 (34, 37, 41, 45, 48, 53, 56, 59) sts. Ch 12 (13, 15, 16, 17, 19, 20, 21, 23). Sk 38 (41, 47, 48, 51, 57, 60, 69, 71) sts, hdc in FLO of nxt 62 (72, 78, 84, 94, 100, 108, 116, 122) sts. Ch 12 (13, 15, 16, 17, 19, 20, 21, 23). Sk 38 (41, 47, 48, 51, 57, 60, 69, 71) sts, hdc in FLO of nxt 31 (35, 38, 42, 46, 49, 54, 57, 60) sts. Join with invslst in 1st hdc of round. <You should have 148 (168, 184, 200, 220, 236, 256, 272, 288) sts, not including beg ch-sp or invslst.>
Round 35: Turn. Ch 1, pull the loop on the hook to tighten the chain a bit, then ch 1 again. Hdc in FLO of first st. Hdc in FLO of ea st around. Join with invslst in 1st hdc of round. <You should have 148 (168, 184, 200, 220, 236, 256, 272, 288) sts, not including beg ch-sp or invslst.>
We will now begin working a band of ribbing around the bottom edge of the sweater, working sideways rows of BLO single crochet.
Row 1: Ch 9. Sk first ch, sc in 2nd ch from hook, sc in nxt 7 chs. <You should have 8 sts, not including beg ch-sp.>
Row 2: Sl st in nxt 2 sts of sweater hem, turn. Sk 2 sl sts just made, sc in BLO of nxt 8 sts. <You should have 8 sts, not including sl sts.>
Row 3: Ch 1, turn. Sc in BLO of same st and in BLO of nxt 7 sts. <You should have 8 sts, not including beg ch-sp.>
Repeat Rows 2-3 until you have worked your way around the sweater hem, ending with Row 2. Your last row worked should meet the first row of ribbing. Tie off, leaving a tail, and whip stitch the foundation edge of Row 1 of the ribbing to the top of the last row of the ribbing. (I like to stitch through the back loop only of the stitches on the last row of ribbing. You can whip stitch the edges together normally if you prefer.) Weave in ends.
Sleeves
We will now work around the edge of the sleeve opening to create the rest of the sleeves.
Turn sweater yoke so that the back of the hdc stitches around the sleeve opening are facing out. Join yarn at the center of the underarm, in one of the chain stitches from Round 34.
Round 1: Ch 1, hdc in same st. Hdc in ea remaining st along underarm chain edge. Yarn over, insert hook into the side of the sideways hdc from Round 34, yarn over, pull up a loop. Yarn over, insert hook in FLO of first hdc along sleeve opening edge, yarn over, pull up a loop. Yarn over, pull through all 5 loops on hook. (We have just created a hdc2tog between the sideways hdc from Round 34 and the top of the first hdc along the sleeve opening edge. This eliminates the hole that would otherwise be there.) Hdc in FLO of nxt 36 (39, 45, 46, 49, 55, 58, 67, 69) hdc sts around the sleeve opening. Yarn over, insert hook in FLO of last hdc along sleeve opening edge, yarn over, pull up a loop. Yarn over, insert hook into the side of the sideways hdc from Round 34, yarn over, pull up a loop. Yarn over, pull through all 5 loops on hook. (We have just created another hdc2tog to eliminate the hole that would otherwise be in this spot.) Hdc in ea remaining ch st across underarm chain edge. Join with invslst in 1st hdc of round. <You should have 50 (54, 62, 64, 68, 76, 80, 90, 94) sts, not including beg ch-sp or invslst.>
Round 2: Turn. Ch 1, pull the loop on the hook to tighten the chain a bit, then ch 1 again. Hdc in FLO of first st. Hdc in FLO of ea st around. Join with invslst in 1st hdc of round. <You should have 50 (54, 62, 64, 68, 76, 80, 90, 94) sts, not including beg ch-sp or invslst.>
Round 3: Turn. Ch 1, pull the loop on the hook to tighten the chain a bit, then ch 1 again. Hdc in FLO of first st, hdc2tog in FLO. *Hdc in FLO of nxt st, hdc2tog in FLO*. Repeat from *to* around 14 (16, 18, 19, 20, 23, 24, 28, 29) more times. Hdc in FLO of nxt 2 (0, 2, 1, 2, 1, 2, 0, 1) sts. Join with invslst in 1st hdc of round. <You should have 34 (36, 42, 43, 46, 51, 54, 60, 63) sts, not including beg ch-sp or invslst.>
Round 4: Turn. Ch 1, pull the loop on the hook to tighten the chain a bit, then ch 1 again. Hdc in FLO of first st, hdc in FLO of nxt 14 (15, 4, 3, 2, 1, 1, 0, 0) sts, hdc2tog in FLO. *Hdc in FLO of nxt 15 (16, 5, 4, 3, 2, 2, 1, 1) st(s), hdc2tog in FLO*. Repeat from *to* around 0 (0, 4, 5, 6, 9, 10, 16, 17) more times. Hdc in FLO of nxt 0 (0, 0, 1, 6, 7, 6, 6, 6) st(s). Join with invslst in 1st hdc of round. <You should have 32 (34, 36, 36, 38, 40, 42, 42, 44) sts, not including beg ch-sp or invslst.>
Cuff Ribbing
We will now begin working a band of ribbing around the bottom edge of the sleeve, working sideways rows of BLO single crochet.
Row 1: Ch 9. Sk first ch, sc in 2nd ch from hook, sc in nxt 7 chs. <You should have 8 sts, not including beg ch-sp.>
Row 2: Sl st in nxt 2 sts of sleeve cuff, turn. Sk 2 sl sts just made, sc in BLO of nxt 8 sts. <You should have 8 sts, not including sl sts.>
Row 3: Ch 1, turn. Sc in BLO of same st and in BLO of nxt 7 sts. <You should have 8 sts, not including beg ch-sp.>
Repeat Rows 2-3 until you have worked your way around the sleeve cuff, ending with Row 2. Your last row worked should meet the first row of ribbing. Tie off, leaving a tail, and whip stitch the foundation edge of Row 1 of the ribbing to the top of the last row of the ribbing. (I like to stitch through the back loop only of the stitches on the last row of ribbing. You can whip stitch the edges together normally if you prefer.) Weave in ends.
For natural fibers, pin project out on foam blocking mats. Spray with water until fully saturated, allow to dry.
OR
For acrylic fibers, pin project out on an ironing board or several layers of towels. Hold a steaming iron 2-3” over the surface of the fabric, making sure all of the fabric is penetrated by the steam. Allow to cool / dry.
Enjoy your finished Round Yoke Sweater!
This pattern is intended for your personal use only. You may not share it, copy it, sell it, give it away, or mass-produce the finished product. However, you may sell the finished items on a small scale, as long as you convey in your item description that you used a Yay For Yarn pattern.
If squeezing yarn, collecting yarn, or making stuff from yarn is your thing, you’ll feel right at home here. My mission is to share the joy of yarn crafts with makers of all skill levels by creating clear, thoroughly-explained video tutorials and modern, approachable projects. So, whether you’re a newbie or you’ve been yarning for years, stick around and check out some of my FREE patterns & tutorials!
Want to share a post from my blog on your website?
You are welcome to share a link to any of my posts on your own website. You may also share one photo from each post, as long as the photo is not altered or changed in any way. Thank you!